
Plus air dry clay in white
Wooden skewer
Small cup of water
Handmade stamps, buttons or anything that will leave an impression
Cream, chocolate brown metallic, Caribbean blue, denim blue and orange acrylic paints
Paint brushes
Black permanent marker
Clear acrylic spray to seal
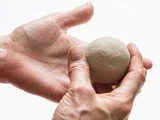
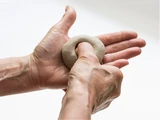
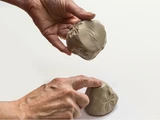
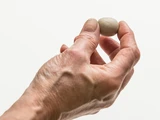
1) How to make a “pinch pot”. Cut off a piece of Plus clay a little larger than a golf ball. Roll into a ball and then begin pressing your right thumb into one side of the clay and begin turning the ball while pinching with your fingers. Cup the ball in the left hand begin pinching the side of the bowl with your fingers on the right hand with your thumb in the middle. Rotate the ball and pinch and turn. This is called making a pinch pot. Set the bowl onto a flat surface and flatten out the bottom of the bowl with your thumbs until it is about 3/8” thick. The bottom should be only about an inch and a half wide. Continue to pinch the sides of the bowl until the side walls are also about 3/8” thick while flaring them out slightly. Make sure not to get the lip of your bowl too thin. This will be the top of your bird bath.
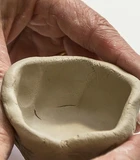
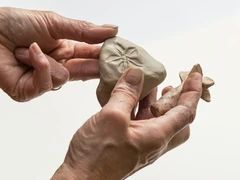
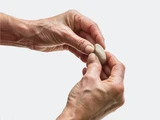
Now, make another pinch pot. This time make the bottom of the pinch pot narrower for a pedestal. Before you join the two pots together you might want to add texture by pressing stamps or buttons into the sides of your pots. Make sure to brace the clay with your opposite hand so that the pot will keep its shape. If the clay begins to crack, just dip your finger into the water and smooth the cracks out.
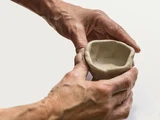
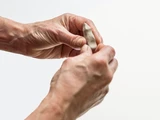
2) Now you are ready to assemble the two pots. Tap the bottom pots slightly on a flat surface so that the pots have a surface to adhere. Mark or score the bottom of the two pots and then slightly wet the scored area with water on your finger or a brush. This creates a type of glue called slip. Next, join the bottoms of the two pieces together by pressing them firmly together. This creates your bird bath and pedestal.
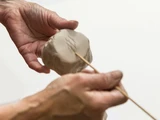
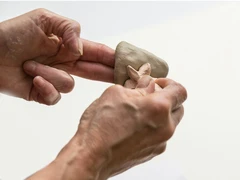
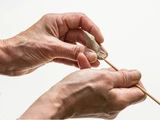
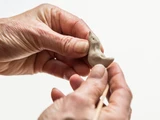
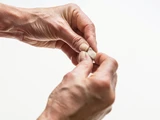
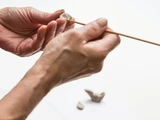
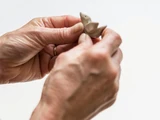
3) Now ready to make the bird? Pinch off a small piece of clay about the size of a grape. Roll the ball in the palm of your hands and then into a tear drop about 1” long. Begin shaping the bird by pulling out a small head and beak on the narrower end. Pull the other end of the body to make a tail feather. With a wooden skewer, draw in eyes, beak and tail feathers.
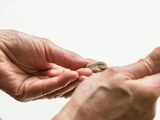
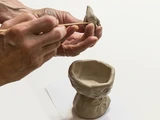
Optional side wings can be made by pinching off two small pieces of clay and rolling then into balls and shaping them into tear drops. With the skewer, score or make small marks on both the wings and the body of the bird where the wings will be attached. With your finger, apply water on the scored clay and then press firmly together. Do this same technique to place the bird on the bird bath. First score the bottom of the bird and then the edge of the birdbath. Then apply water with finger or brush to both scored areas and then firmly press the bird on the bird bath. Let this dry completely.


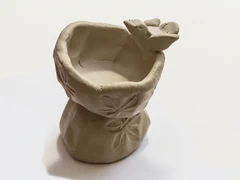
4) Paint the bird and bird bath with cream acrylic paint. Let dry. Brush watered down brown metallic acrylic paint on bird bath only and wipe off with a cotton cloth to create a patina look. Paint the bird denim blue with the beak orange. Paint the water in the bird bath with Caribbean blue. Use a black permanent marker to mark the eyes and to write your name on the bottom. Let dry.
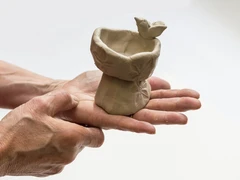
5) Spray or brush clear acrylic paint to seal your bird and bird bath. Let dry. This piece is for decoration only. Enjoy your beautiful bird bath!
Artwork created by Karen Lowrey 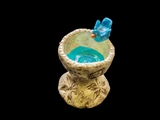
Photography by Don Auderer