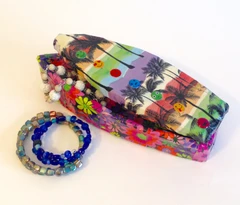
This cute and colorful paper maché box is sturdy enough to hold all sorts of little treasures! Use it for jewelry on your nightstand, paper clips or pushpins on your desk, or even Q-tips in the bathroom. The best part is knowing you sculpted it yourself!
Supplies:
- ACTIVA CelluClay
- Non-stick work mat
- Wood skewer, water mister bottle
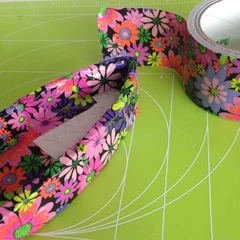
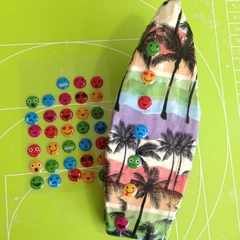
- Printed Duck Tape® brand duct tape
- Dimensional adhesive stickers
- Cardboard, pencil, fine-grit sanding block
- Plastic bag, waxed dental floss, baker’s cooling rack
- Scissors with non-stick blades
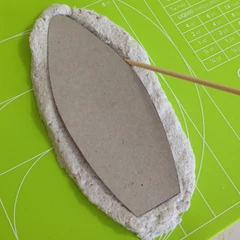
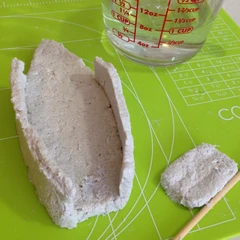
1. Draw or trace a surfboard shape (approx. 10” tall) on cardboard and cut out.
2. Mix paper powder with water per the manufacturer’s directions to make clay. Press a large portion of clay on to your non-stick work surface to approximately ½” thick.
3. Use the skewer to trace around the surfboard and cut out the bottom for your box. Smooth out the edges with wet fingers.
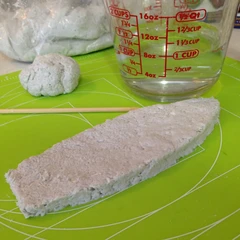
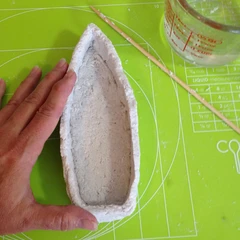
4. Press the remaining clay to be just a little bit thinner than the bottom, cut out strips approximately 1.5” x 4” and gently press each strip vertically against the bottom to build up the sides of your box. Keeping your hands wet while working makes this step easier.
5. Join the strips together by rubbing the seams on both sides with your wet fingers. Gently press and pinch the sides as needed to ensure the sides are nicely shaped all the way around.
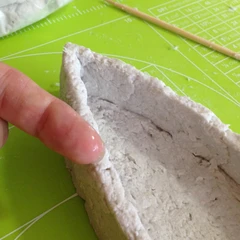
6. Use your wet fingers to smooth out the top edge of the box sides – you want them even and flat so the box lid will sit nicely on top. Smooth out the inside seams where the sides meet the bottom.
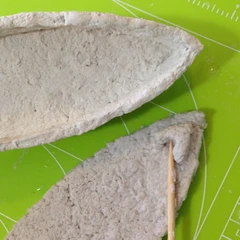
7. Allow the box bottom to dry undisturbed for at least 24 hours. The sides are likely to dry first – when they are completely dry and rigid, slide a taught length of waxed dental floss underneath the box from top to bottom to make it easier to release it from your work surface. The clay will probably still be damp on the bottom, but it should still hold its shape so you can move it on top of a baker’s cooling rack to allow air underneath. Leave it to finish drying for at least another 24 hours.
9. The top of your clay will become the bottom of your lid when dry. Press down a pinch of clay at the top and bottom of the lid (position about ¼” in from the edge) to make little knobs that will help the lid fit more snugly on the box.
10. Smooth all the edges and repeat step 7. When the lid is dry, test how it fits on the box bottom and gently sand the edges as needed. If the fit is super snug, you may prefer to paint the clay to finish your box, rather than add more thickness by covering it with duct tape.
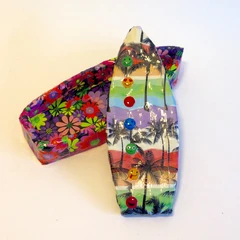
11. Press the first strip of tape down the length of the lid and wrap the ends around the edge to the underside. Press the tape to fit snugly around the knobs. Match up the pattern on top and press additional strips to either side of the first strip.
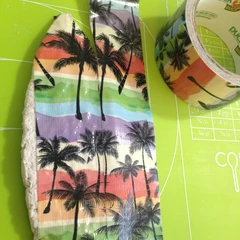
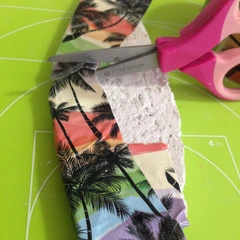
12. Make small cuts to the tape before pressing it down to the underside to fit more smoothly around corners and curves. Place a final strip of tape on the underside to cover.
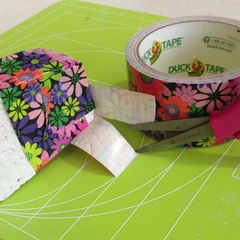
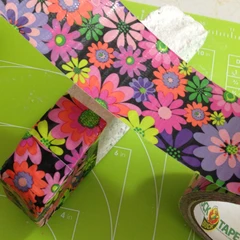
13. How you choose to wrap the tape around the box sides and bottom will depend on the pattern and if you want to avoid seeing extra seams. Since this flower tape has a random all-over design that disguises the seams, I wrapped each strip horizontally across the back, up the sides and down into the box
14. Add small pieces of tape as needed to cover any exposed areas inside the bottom of the box.
Enjoy your new Paper Mache Box!