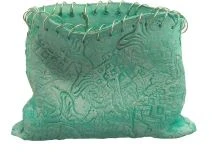
Activ-Clay Terra-Cotta Box
Material:
One package ACTIVA Terra Cotta Activ-Clay
A carving tool.
Rolling pin
Instructions:
1. Roll out whole pkg terra cotta clay on plastic wrap, to ¼” thickness.
2. Carve designs all over the clay with any type of craving tool, I used the round end
of a paintbrush, you can use a toothpick, nail, fork etc.
of a paintbrush, you can use a toothpick, nail, fork etc.
3. Cut out 4 squares the same size; a square post-it note makes a good pattern.
4. Cut one square ¼” larger on 2 sides, this is the bottom of the box.
5. Score (make X’s in the clay all around the bottom of the box inside edges.
6. Score the sides of the box pieces.
7. Start putting the box together; put a little water on the scored edges, this will help
them stick together. Seal the edges, smooth with water. When all the sides are on
you can re-carve the smooth areas with the carving tool.
them stick together. Seal the edges, smooth with water. When all the sides are on
you can re-carve the smooth areas with the carving tool.
8. Put the left over clay in an airtight back until the box is semi dry.
9. Roll 4 balls, score one area, stick top bottom of the box, use water in scored area.
Turn the box over, this will help them stick together better.
10. Make a snake with the clay, score the snake and the top edge of the box, put water
on both, attach the snake to the top edge of the box. Make impression in the clay
with the carving tool.
on both, attach the snake to the top edge of the box. Make impression in the clay
with the carving tool.
11. Set aside to dry completely.
12. Can be let unsealed or sealed with a liquid or spray acrylic sealer.