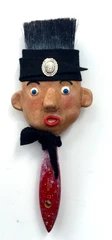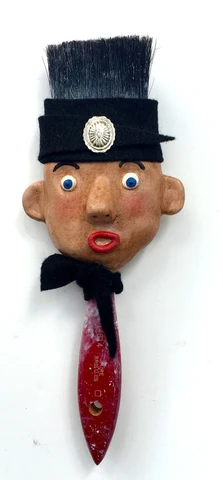
When I discovered folk artist Gregory Warmack, better know as Mr. Imagination, I fell in love with his whimsical style and use of recycled materials. I think you will fall in love too with this simple but exciting project inspired by his Paintbrush People.
Materials:
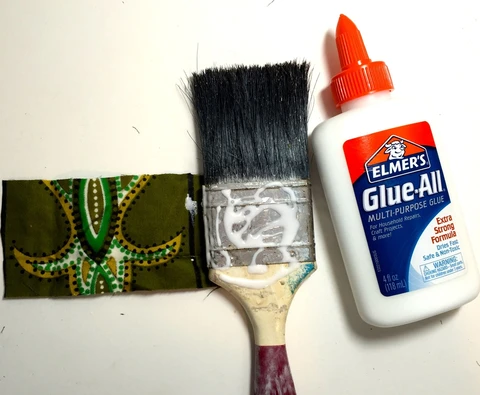
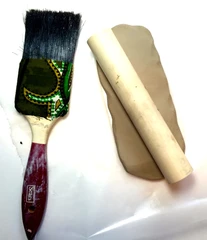
Old Paintbrush
Strips of scrap material
Elmers Glue-All
Approx. 1/4lb of Activ Clay
Wax paper
Craft paints
Small paintbrush
Wooden skewer
Pencil with eraser
Gesso
Felt
Hot Glue
Modge Podge
Antiquing medium
Use Elmer's Glue-All to adhere a strip of cloth to the rigid, metal area of the paintbrush, this will ensure the clay will not crack while drying.
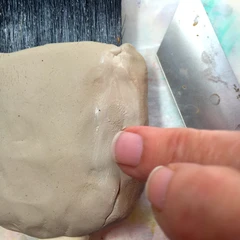
Press or roll out the 1/4lb strip of clay til about 1/4” thickness, (reserve a small amount of clay for nose, ears, mouth and eyes). Apply the strip of clay to the fabric covered portion of the paintbrush. Use your fingers and a little water to smooth the seam where the clay meets on the back of the character.
Take small bits of the leftover clay and form into ear, nose and mouth shapes. A small snake of clay works well to form the mouth. You may also use a small snake of clay to better attach the ears and nose.
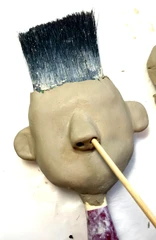
Once the appendages are attached and the snake coiled around them use your fingers, the end of a paintbrush or a clay tool to smooth the areas. A skewer may be used to make the nostrils in the nose.
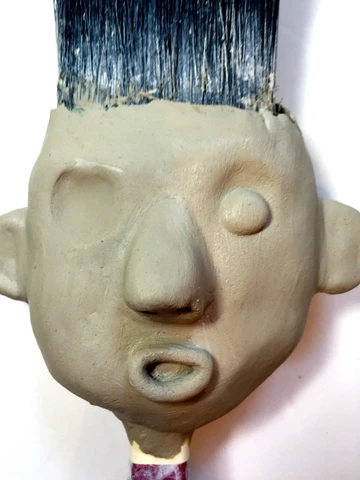
Press small indentions into the clay for eye sockets. Roll a small ball of clay and press into the indention for eyeballs. Use fingers or tool to smooth the eyeball into the socket.
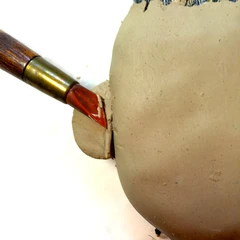
To further smooth attached appendages, eyes and face use a small paintbrush damp with water to even out all areas of the character. Dry overnight in an upright position.
You may put a coat of gesso on the dried character or paint directly onto the clay. I prefer the white gesso before applying paint for more of a true color.
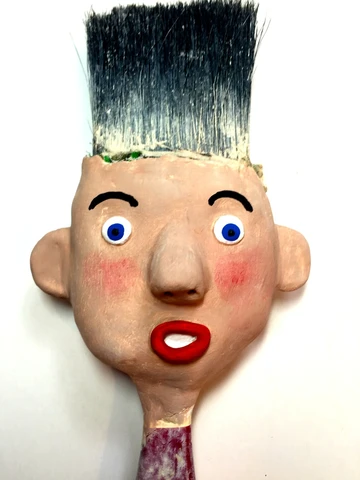
Mix brown and white craft paint for the skin tone of the character, applying one or two coats. Use a pencil eraser dipped in paint as a stamp for the circles in the eyes. A permanent marker works well for the eyebrows and the black dots of the eyes. Paint the lips with red craft paint. For a hint of rosy cheeks use your finger to dab on a little red paint mixed with water.
For finishing apply a coat of Modge Podge. When dry, use a small paintbrush to apply either an antiquing medium or a brown paint mixed with water to the character, wipe a portion away with a soft cloth. Cut strips of felt, hot glue them onto the paintbrush where the bristles meet the metal area of the brush. Embellish the head dress with an old piece of jewelry, add a felt neck scarf with a drop of hot glue.
Tips:
Googly eyes may be substituted for the clay eyes.
It is not necessary to use an antiquing medium if you are happy with your character.
Buttons make great embellishments for the head dress.