Supplies
1 LB Package of Natural ACTIV Clay - Air Dry Clay
Clay Roller Kit
Mini Gingerbread Man Cookie Cutter
Pliers
Paint
Paintbrush
Awl
Chain
2 Jump Rings
Clasp
Ring Blank
E6000
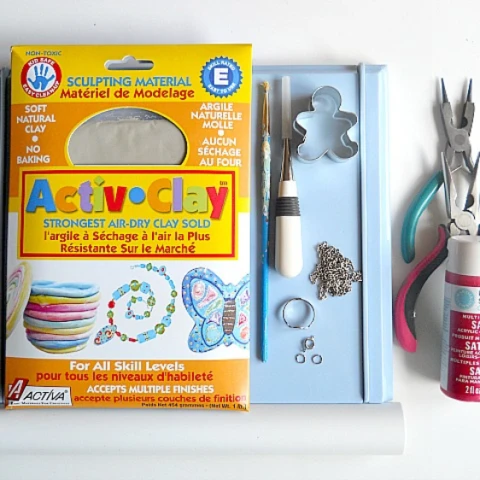
Please refer to the above list for all the supplies used in this project. With that
being said, I did want to take some time to talk about two products that I'm using,
which you may not know about. Those two products are ACTÍVA Product's air dry clay
and clay roller kit. Both of these products are really great to use if you have never
worked with clay before. For example, ACTÍVA's air dry clay does not need to be
baked in the oven and dries (completely) after 24 hours. The clay itself, also comes
in variety of colors like terracotta, white and natural. However in this project, I am
using the natural. Now the clay roller kit that I'm using, is a nice starter kit if you
don't have any clay tools. In the kit you get a rolling board, roller and 4 sets of ''rails''.
These ''rails'' are used to help control the thickness of the clay and are put into each
side of the rolling board. Even though these particular products are not ''necessary''
to make this project, they do help make the DIY process much easier! So it's just
helpful information to consider before you begin the project!
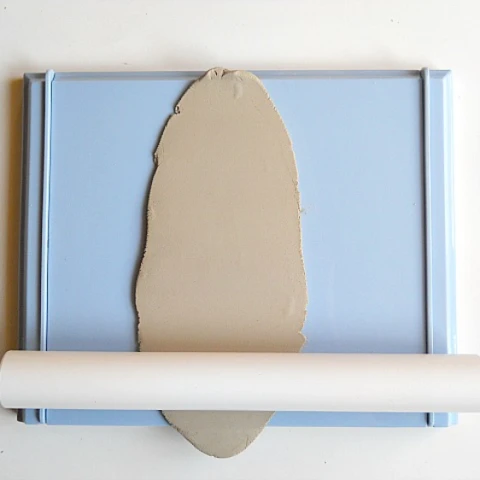
If you're using the Clay Roller Kit by ACTÍVA Products, grab your rails in the
thickness of 1/8 inches and put them into each side of your clay roller. This
will help to insure that your clay's thickness is 1/8 inches. Once the rails have
been put in, roll your clay until you have a nice ''slab''. On a side note, the nice
thing about using ACTIV air dry clay, is that no kneading is involved! You can
just grab the amount of clay that you need and then jump into your project.
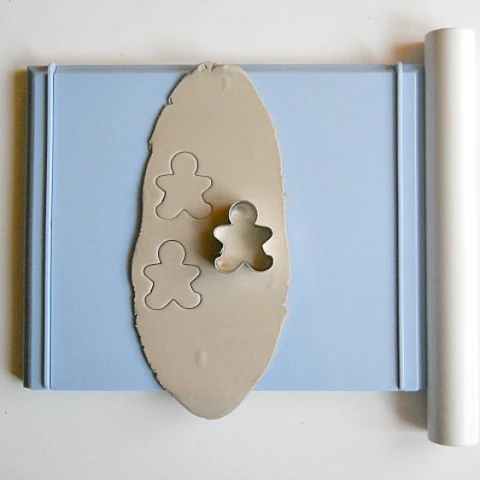
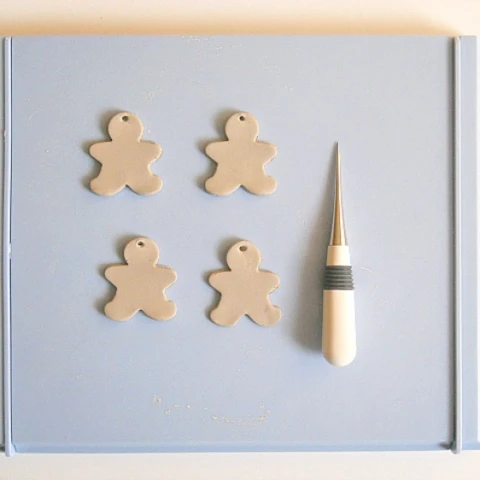
out your gingerbread men! For this project you will only need 2 gingerbread men,
but I would cut out a few more encase you don't like how they dry.
After you cut out your gingerbread men, grab your awl and poke a small hole
at the top of some of your gingerbread men's heads. By doing this, we are
creating a way to attach our gingerbread men to our chain later. Once you
have created your holes, set your gingerbread men aside to air dry for 24 hours.
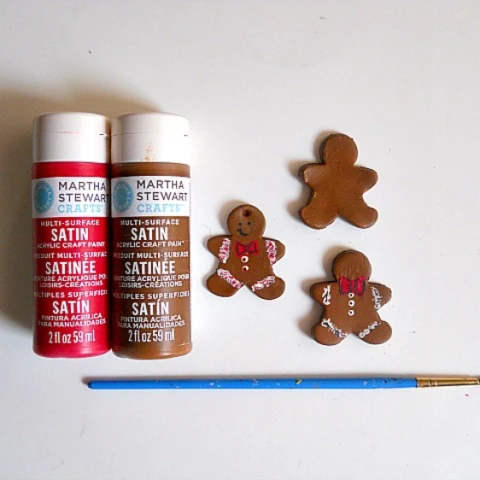
When your gingerbread men have completely air dried, you're ready to paint them!
Paint your gingerbread men (front and back) however you want, then set them aside to dry.
When the paint on your gingerbread men are dry, you're ready to turn them into jewelry!
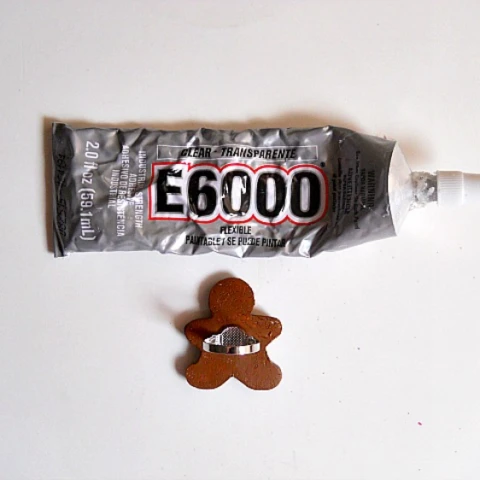
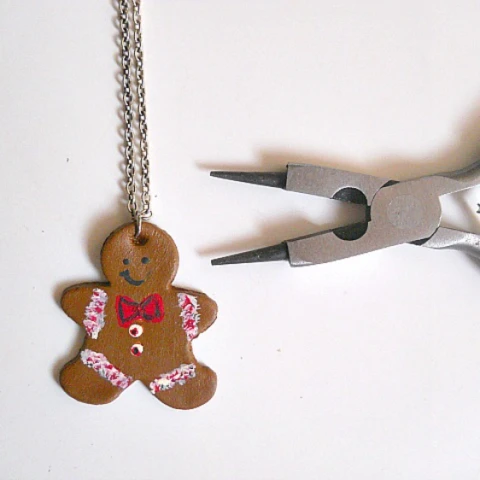
To make a ring, all you need to do is flip one of your gingerbread men over and glue
(using your E6000) a ring blank to its back. Then set your ring aside to dry.
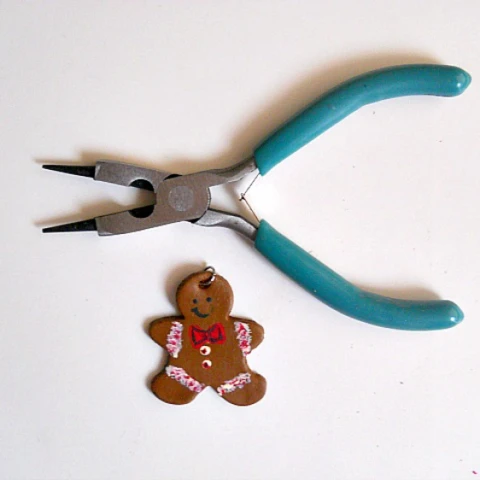
Now to make your necklace, first grab a gingerbread man with a hole at the top
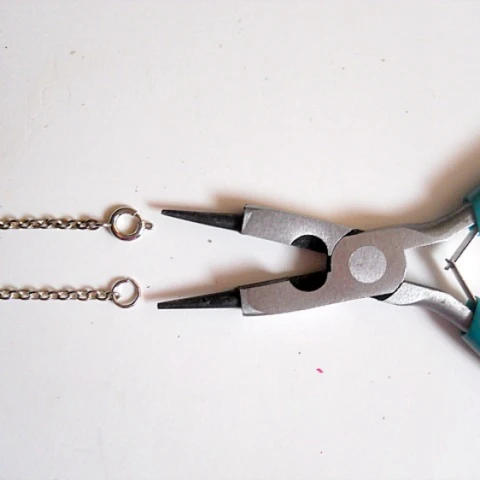
and attach a jump ring.
Take your jewelry chain and cut it to the length you want your necklace to be.
My necklace ended up being 12 inches long which means you would want
24 inches of jewelry chain. Then at one end of your chain attach your clasp
and at the other end, a jump ring.
it to your chain.
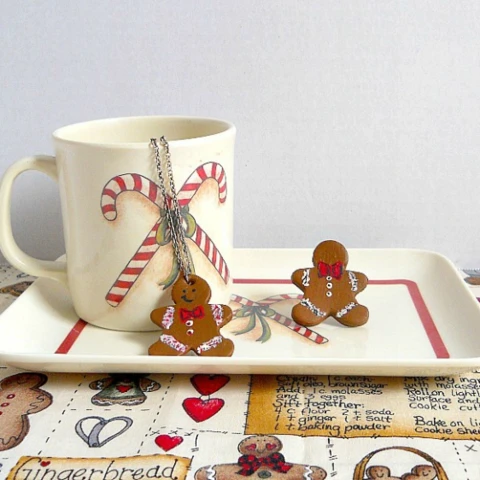
When your gingerbread man ring is dry and your necklace is all put together,
then you're ready to wear your new set of gingerbread men jewelry!
Besides this being a grown up project, this could also be something fun
to make with the kids. Also, if you have a set of Christmas cookie cutters,
you could easily swap out the gingerbread man and use a tree or Christmas
light bulb cookie cutter instead. Happy Crafting!
This craft project was created by Katie King via Guide Central