Supplies
ACTÍVA Products Plus Air Dry Clay in white
Rolling pin
Cookie cutter in desired shapes
Ribbon
Ball tool (optional)
Rhinestones (optional)
Paint pens
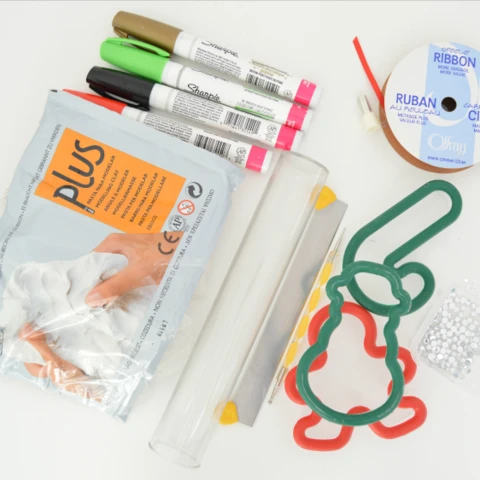
Gather your supplies. I am using ACTÍVA Products Plus white air dry clay here,
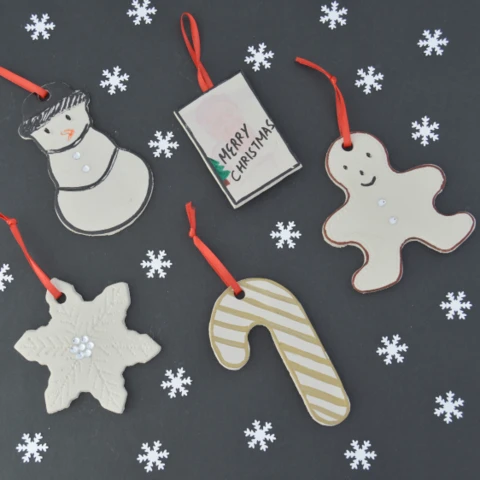
In this guide, you will learn how to make gift tags using air dry clay, they are so
easy to make and can be customized in lot of ways to suit your taste. Paper gift
tags are often thrown away once the recipient consumes the gift . When gift tags
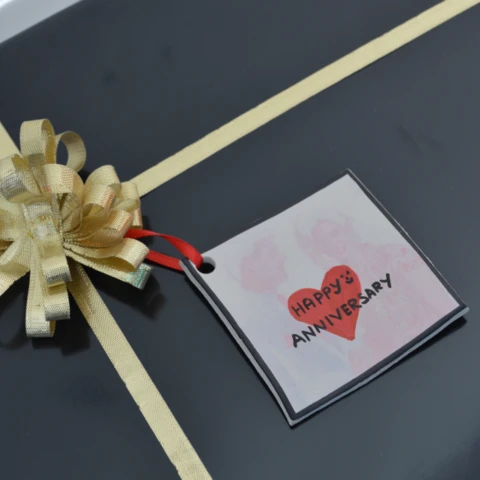
are made this way, they can be reused as ornaments for the next year in your
remembrance or can be even made as fridge magnets (discussed later in the guide).
This gift tag idea is suitable around the year and it is so easy and quick to make.
Let's get started.
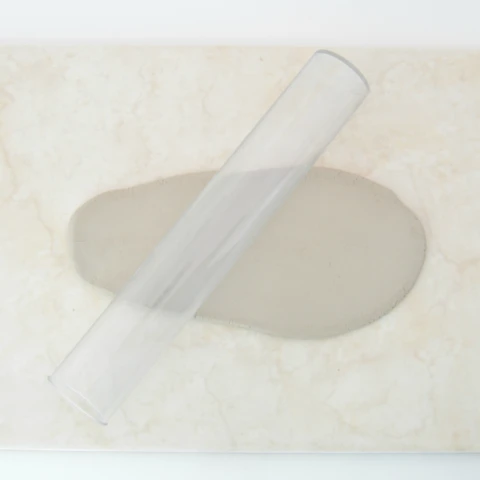
Take a piece of clay from the package and roll it flat using a rolling pin.
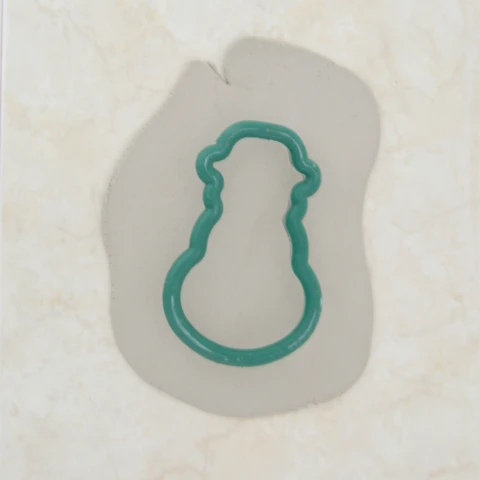
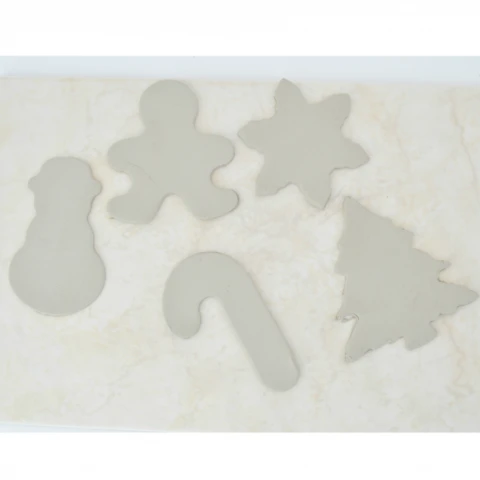
Use cookie cutter to cut a shape for making gift tags. Or you can even use
blade and cut any simple geometric shape to make your gift tag.
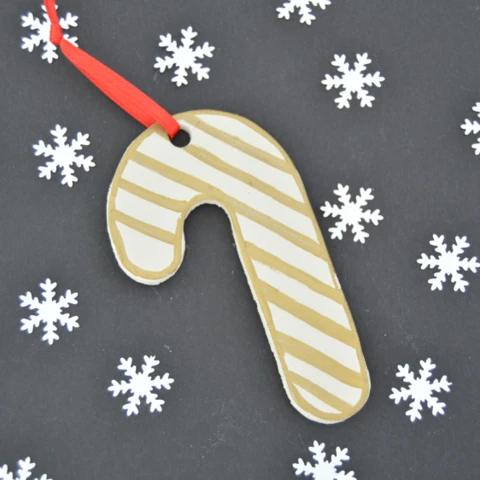
As Christmas is approaching, I made few Christmas themed gift tags.
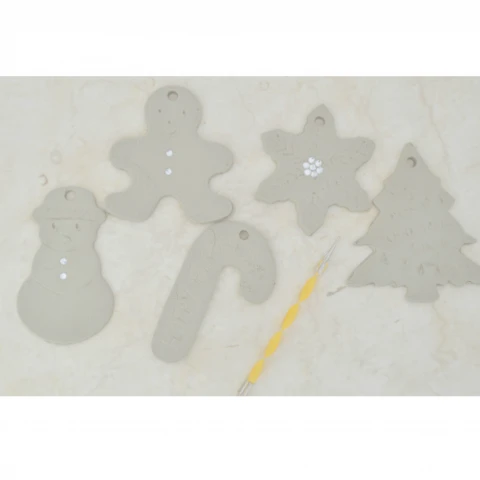
them wherever you think they are appropriate. Glue is not required. Use a ball
tool to engrave your personalized message, add details like eyes and other
decorative elements. Use a straw or a small cookie cutter to make a hole on
top to string a ribbon. Allow the gift tags to dry.
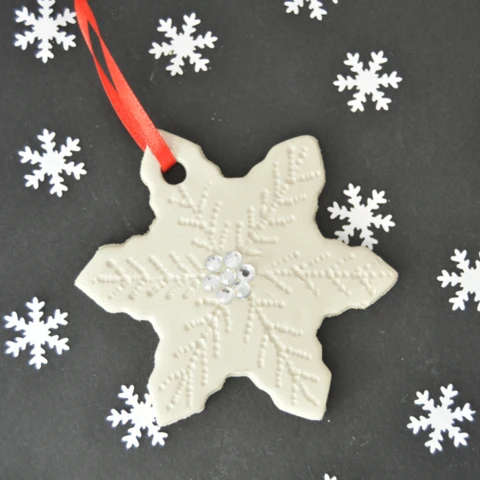
It will take a day to dry completely (depending on the thickness). String a piece
of ribbon on top and secure it with a knot.
can even use a toothpick or even a bobby pin to add finer details as shown here.
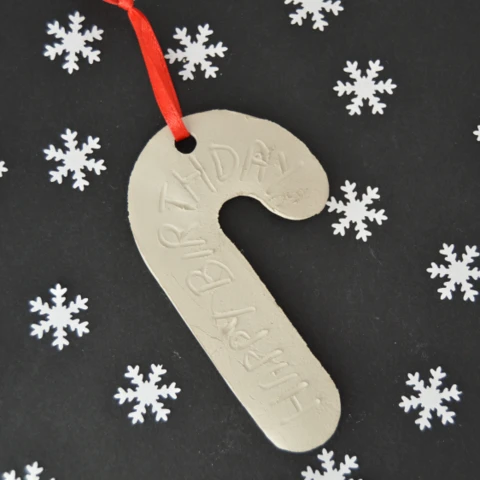
If you know someone who is celebrating their birthday on Christmas day, you can
also use the ball tool and engrave "Happy Birthday".
And use paint pens to decorate the front of the gift tags.
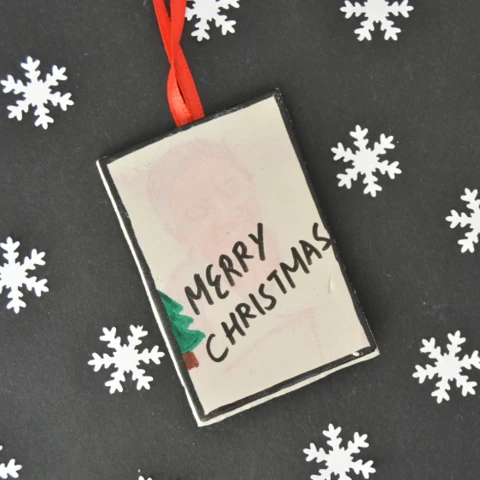
I also tried the image transfer technique to add more personalization to the gift tag.
To do this, just print your photo on plain copy paper using an inkjet printer. Just press
the photo on the wet clay and leave it for 20- 30 seconds and remove them. You will
get a light imprint of the image on the clay. Be sure to flip the image before printing.
You can use markers or paint pens to add any message on top once it is dry.
Add a ribbon on the back with a piece of tape so that the recipient can use them as
fridge magnets if they want to.
If you want, you can also highlight the engraved details using marker or paint pens.
I hope you enjoyed these easy peasy reusable gift tags using ACTÍVA Products
Plus air dry clay.
This project was designed by Sahana Ajeethan of Guide Centr.al