Supplies
• Activ Air Dry Clay
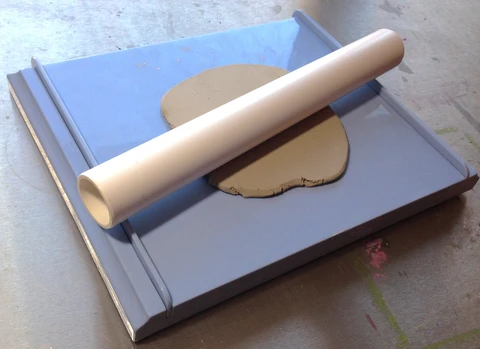
• Clay Roller
• Wood skewer, sanding block, circle cookie cutter
• Craft paint, paint brush
• Embroidery floss, needle
• Non-stick work surface
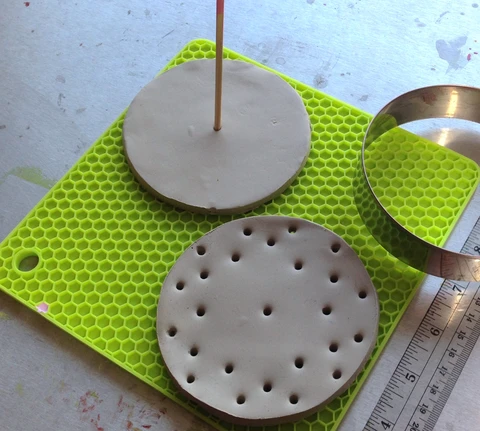
silicone hotpad – the cells of the honeycomb pattern gave room for the
skewer to go all the way through the clay when poking the holes.
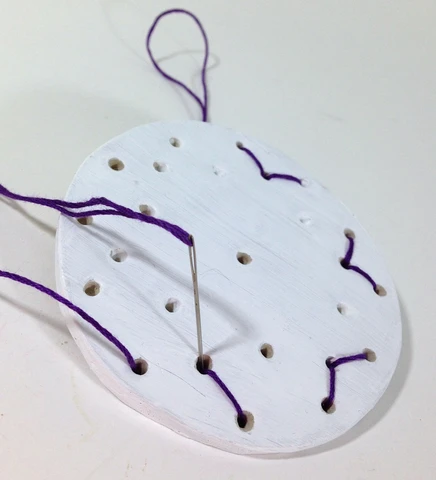
3. Leaving the circle flat on the work surface, poke holes through the clay with
a wood skewer. Start around the edge of the circle, then alternate the holes
inside the outer circle. Poke a slightly larger hole in the center. To help keep
the holes equi-distant, think of the circle like a clock face and poke the holes
opposite each other first – 6 and 12, 3 and 9, etc.
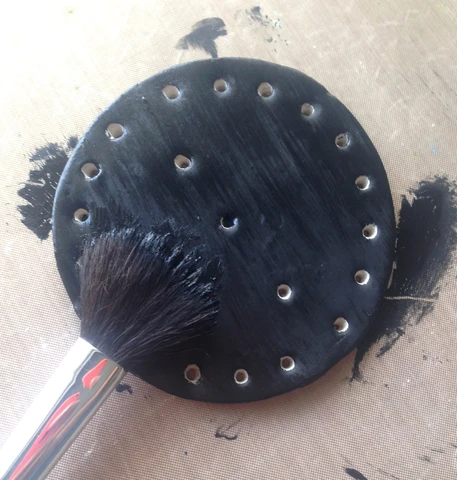
dry (still cold to the touch), pick up the circle and carefully poke the skewer through
each hole again, to ensure a clean opening.
use a small brush to paint color inside the holes if desired.
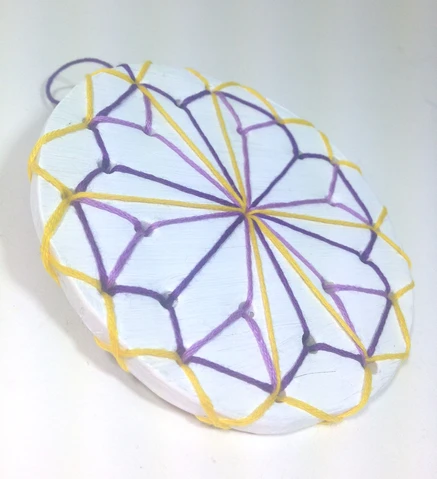
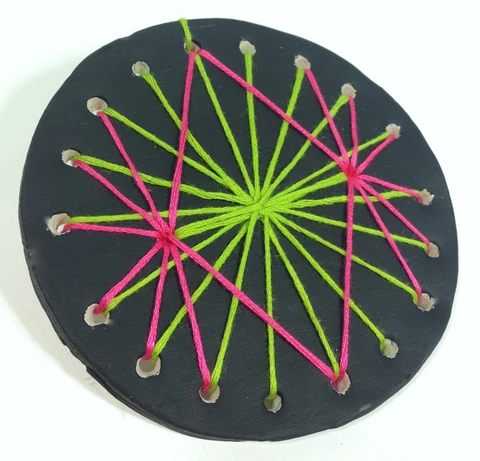
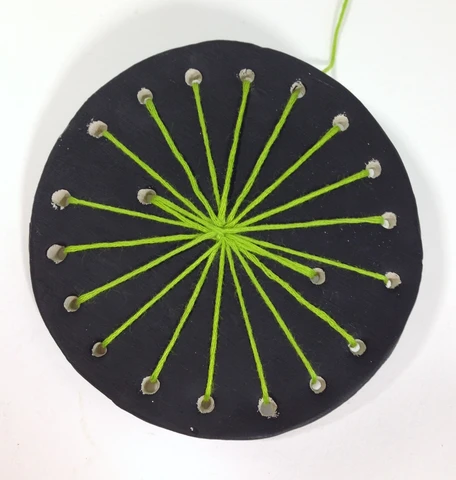
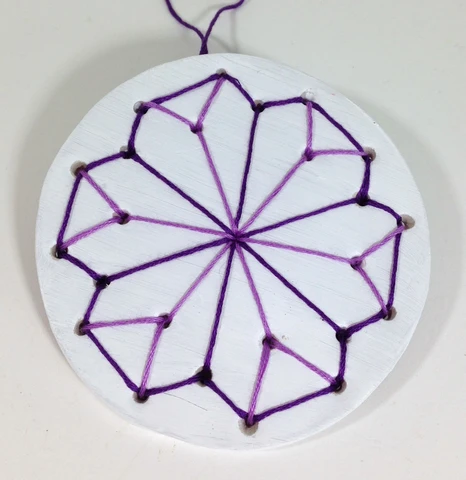
your mandala pattern from the back to the front, through the top hole. Let an 8”
length of floss stay loose in the top hole to knot into a hanging loop later.
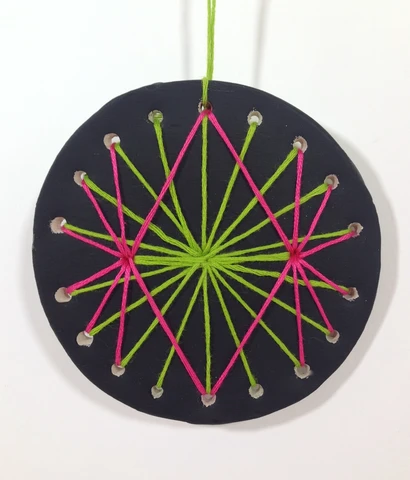
around the perimeter, whip-stitch around the edge – get creative with patterns
and different colors of floss!
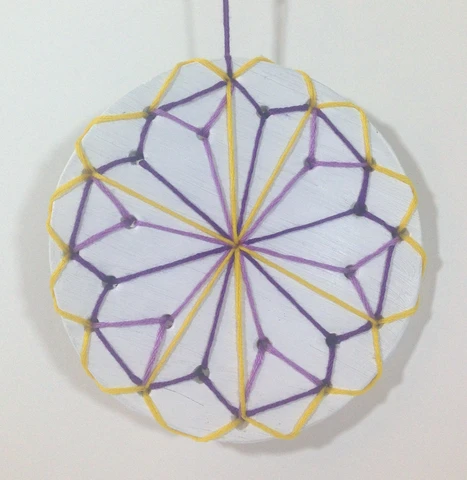
the floss at the top for hanging. Glue a circle of felt or cardstock on the back to cover.