
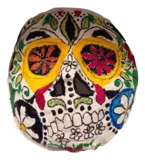
• Enduring Idea: The Learner will connect art to Hispanic culture and their traditions by learning about Dia de los Muertos – Day of the Dead. The learner will artistically create a Day of the Dead mask out of Rigid Wrap.
• Grade Levels: 4th – 8th
• Cross Curriculum: Social Studies, Bilingual studies
• Understands selected attributes and historical developments of societies in Africa, the Americas, Asia, and Europe.
• Understands the daily life, history, and beliefs of a country as reflected in dance, music, or the other art forms (such as painting, sculpting, and masks).
• Knows the holiday and ceremonies of different societies.
TEKS Art
• Explore ideas in family and community.
• Discuss elements and principles of art: balance, symmetry, form, line, color
• Practice and produce modeled forms, sculptures
• Connect art to history and cultures
Measurable Objectives:
• Students will be familiar with the holiday, Dia de los Muertos, telling about its origins and by creating their own decorative or functional mask out of rigid wrap and selected other art materials.
• ACTÍVA Rigid Wrap
• Petroleum Jelly
• Water bin
• Various acrylic paints or permanent markers can be used to decorate
Resources:
• Printed examples of various sugar skulls or Day of the Dead mask designs to have as examples
• YouTube - CGI Student Academy Award Gold Medal Winner Short Film HD:“Dia De Los Muertos”
• Discuss with students the brief history and origins of Day of the Dead and some of the traditions associated with the holiday. Show one of the videos above to peak interest. Many children associate skulls with scary stuff. Be sure to explain to them that these are created to memorialize loved one in a joyous way and as a celebration of their life.
• Make a distinction between Halloween and Day of the Dead. Halloween is October 31. Day of the Dead is November 1 and 2nd.
TIP Plaster cloth has one side cloth and one side plaster side - Keep the plaster side to the surface for a smoother finish.
• Cut rigid wrap into small strips about 2” x 5” and have ready.
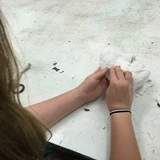
• Demonstrate applying the petroleum jelly to the entire face being sure to cover eyebrows well.
• Dip the strip into the water bin and begin applying to the face, framing the face first and then working in. Be sure to use a few small pieces around the nose, keeping the airway open and clear. Rigid Wrap should slightly overlap. Repeat the application process using two layers, to create a strong mask. Using water on your fingers, smooth the mask well to create a smooth paintable surface.
• Students should work in pairs.
• The rigid wrap will begin to dry pretty quickly. Once it feels firm to the touch, have the student in the mask make funny faces, wrinkling the brow, wiggling the jaw, etc. The mask will begin to lift right off and should be removed gently.

• With a pencil, name can be written on the inside of the mask.
• Next class period, lay on the work tables the examples of various Day of the Dead
skull designs. Masks can be cleaned up at the edges using scissors.

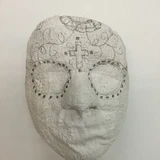
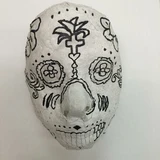
The learners will create their own design on their mask using a black sharpie.
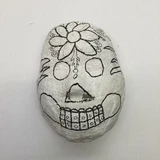
• Once the masks are dried, spray with an acrylic protective spray. Also, artists may add flat backed gems, flowers, sequins, etc.
• Create a class ofrenda (altar). Encourage students to bring pictures of loved ones who have died who they would like to remember. Set up a table with bright coverings, platters of breads or cookies, and vases of flowers. Have students display their sugar skulls on the ofrenda.
• Using ACTÍVA fast mache have students create mock sugar skulls.
• This lesson could be applied to any mask making project: tribal, mardi gras, venetian, etc.
Lesson plan created by Melinda Dunn