Candy Heart Sculptures!
24:48
Summary:
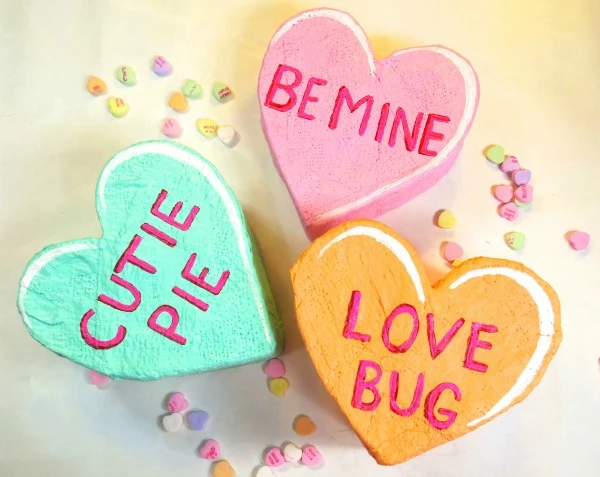
In this fun lesson plan by art teacher Cassie Stephens, the learner will sculpt candy hearts with Rigid Wrap™ Plaster Cloth.
Objective:
Follow step-by-step instructions and write creative Candy Heart sayings (language arts); to create a 3-D sculpture and mix tints of colors (visual arts).
Time: Two, 1 hour sessions
Skill Level: 4th grade and up
Materials needed:
- ACTIVA® Rigid Wrap™ Plaster Cloth 4-in x 180-in Roll
- 2” X 24” poster or tag board
- 2 pieces of tag board, 8” square
- Stapler
- Masking tape
- Acrylic paint
- Paintbrushes
- Pencil
Step 1:
Fold strip of tag board in half lengthwise. Bend the open parts of the tag board inward, forming a heart shape. Staple the top of the heart in place. This is will be the sides of the heart.
Step 2:
Place the heart shape on two pieces of tag board and press down firmly. Trace around the heart shape. Cut the traced hearts out. These will be the top and bottom of the heart.
Step 3:
Place pieces of tape around the outer edge of the heart, like tabs. Fold those tabs over the heart created in the first step. Do this with both hearts cut out. This will be the armature for the sculpture.
Step 4:
Cut the Rigid Wrap™ Plaster Cloth into strips. Dip in water and squeeze excess water out between fingers. Drape the Rigid Wrap over the heart armature. Do this to both the front of the heart, the back and the sides. Allow to dry for at least 24 hours.
Step 5:
Create a color for your heart. To make a color light, add white. For example, to create pink use red and white. Paint the entire heart.
Step 6:
Once dry, pencil in your Candy Heart saying. Enjoy your Candy Heart Sculpture or give to a friend!