Summary:
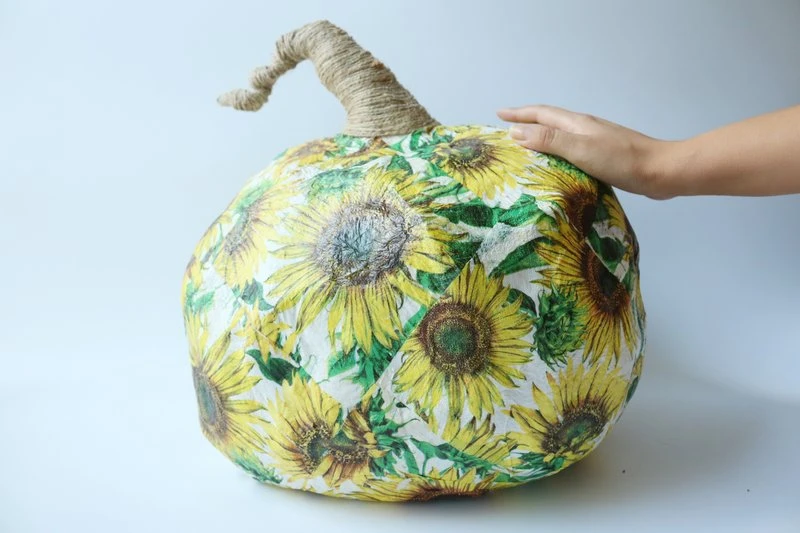
It’s the pumpkin season! Create your very own unique pumpkin using two of our favorites, CelluClay and Rigid Wrap.
SAFETY TIPS:
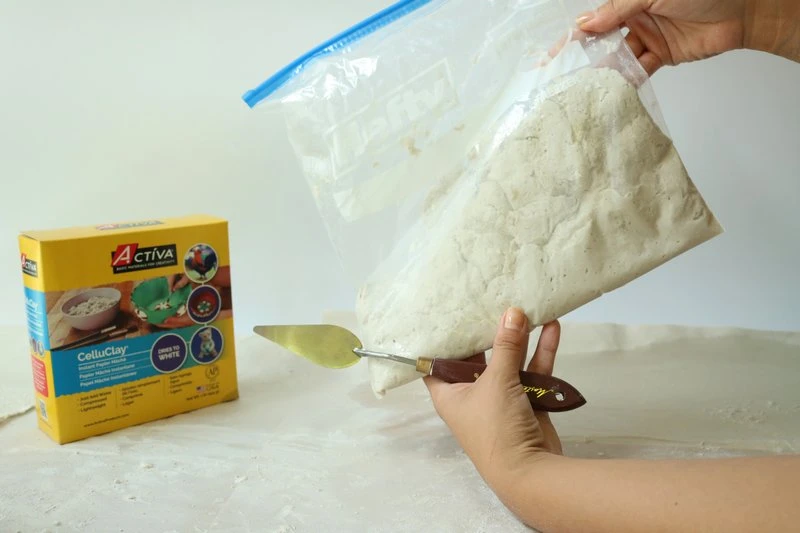
CelluClay can be mixed in any plastic container, we recommend always doing it in a ventilated room, or for easier preparation, use a Ziploc plastic bag.
Materials Needed:
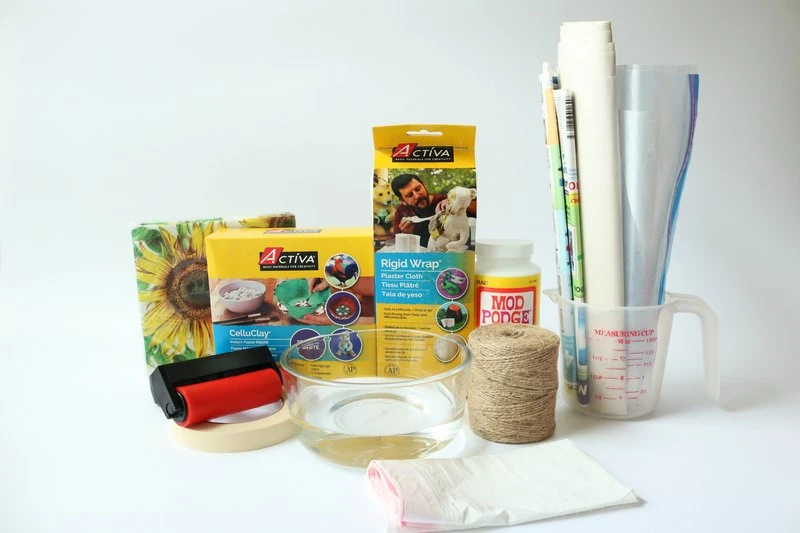
- CelluClay
- Rigid Wrap
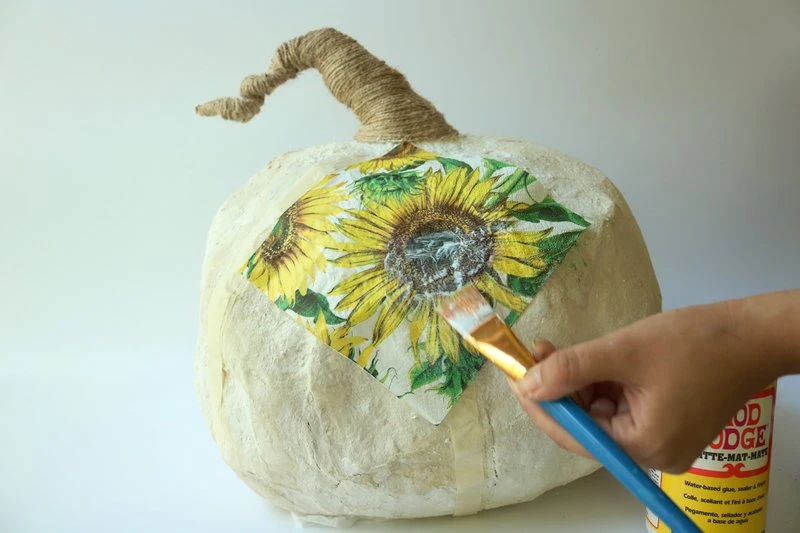
- Paper napkins (any print you prefer)
- Tall kitchen plastic bag
- Recycled newspaper
- Glass bowl with water
- Mod Podge matte finish
- Mod Podge decoupage tools
- Jute cord
- Brush
- Large ziploc bag
- Measuring cup
- Spatula
Step 1:
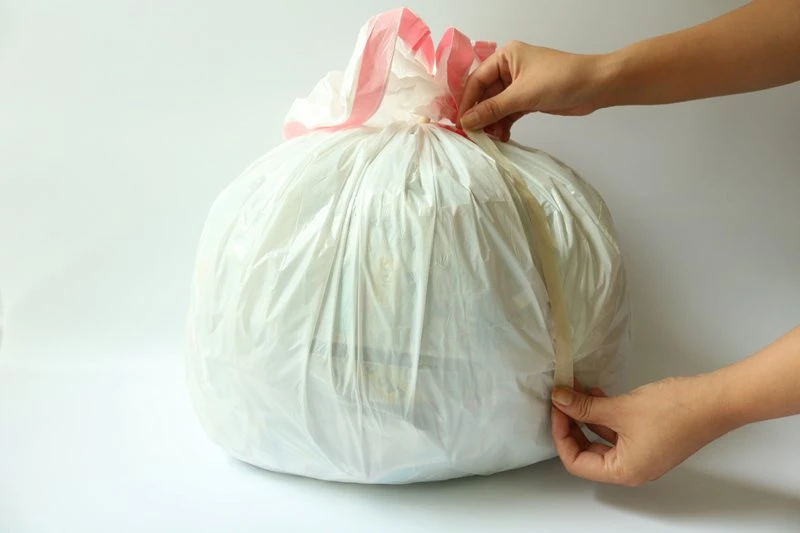
Start by filling the large plastic bag with newspaper

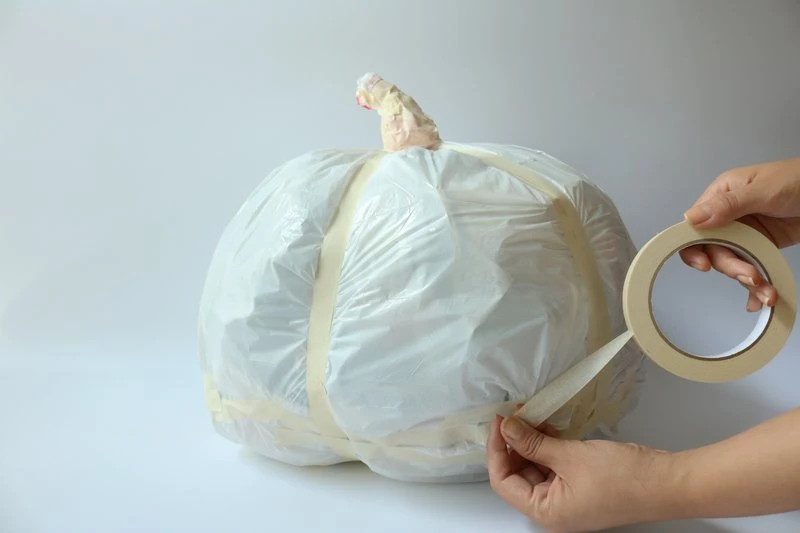
Step 2:
Use masking tape for closing the top and creating the stem and the shape of the pumpkin
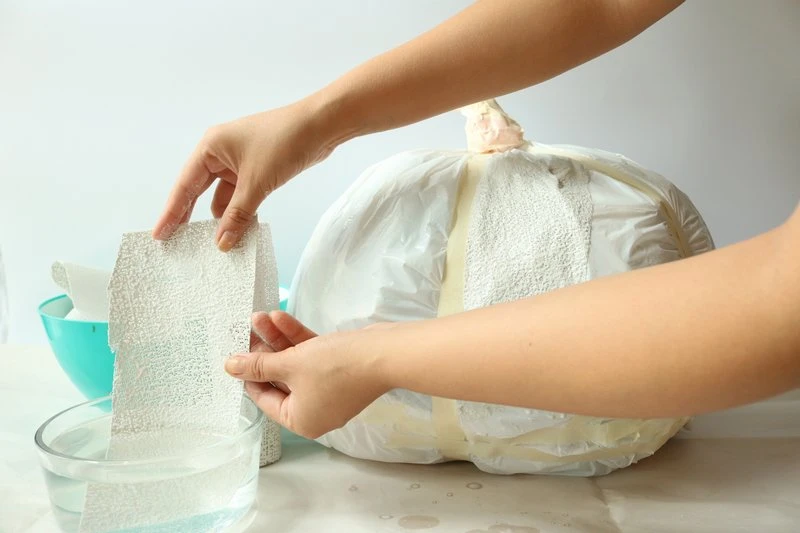
Step 3:
Cut Rigid Wrap plaster cloth into 15 inch strips or less, dip a strip into a bowl of water, run your fingers over the plaster cloth to remove excess water, smooth the plaster cloth carefully over the structure
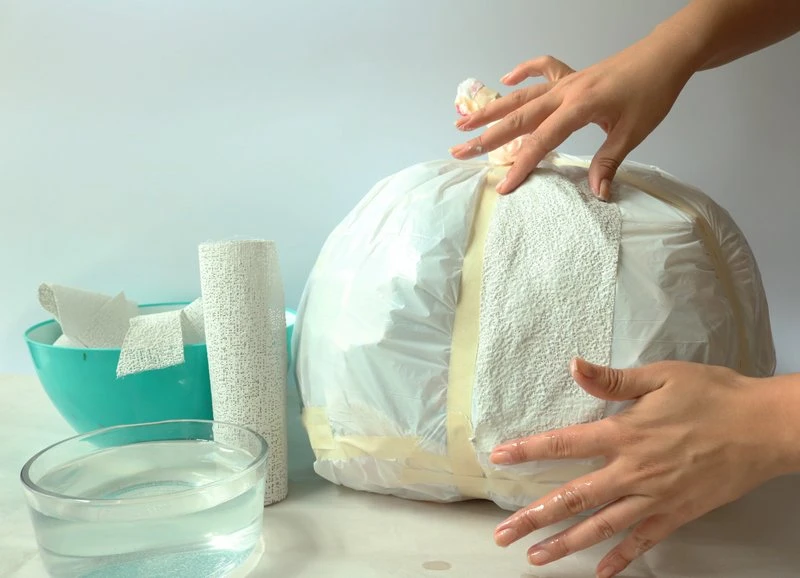
Step 4:
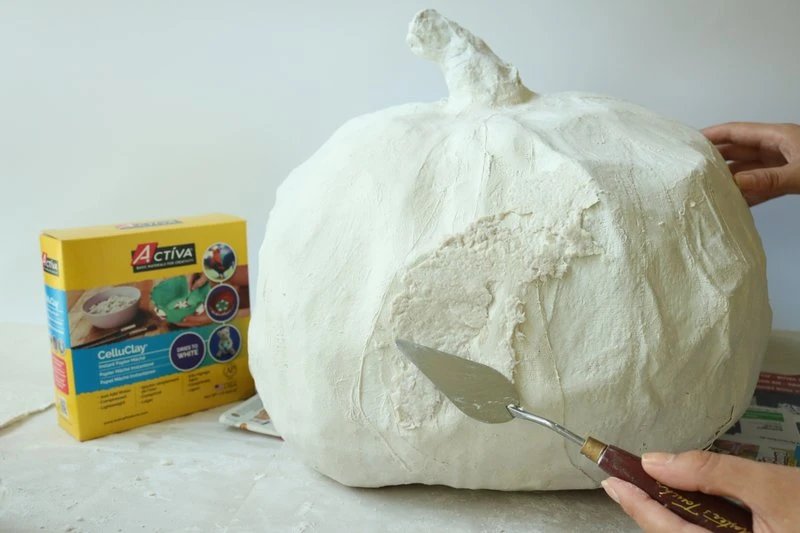
Add 2 layers of plaster cloth, let it set for 30 minutes
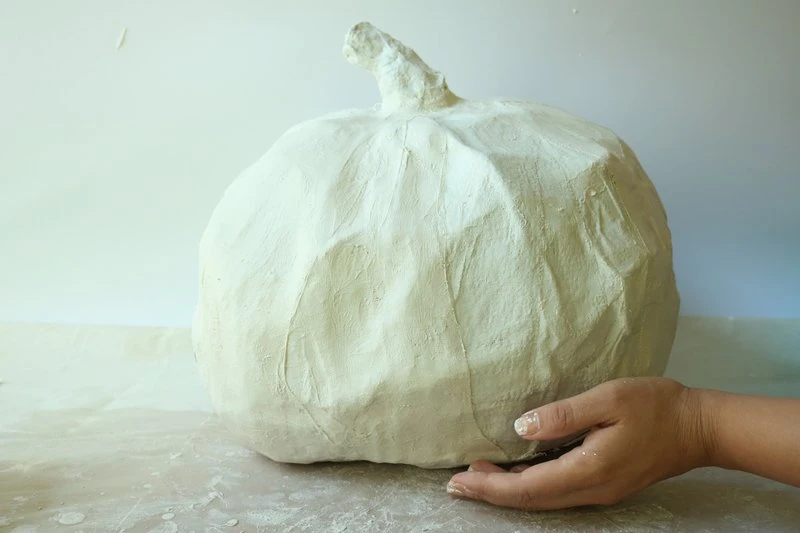
Step 5:
Mix 4 cups of CelluClay Paper Mache per 2 cups of warm water in a Ziploc bag, use the spatula to spread the paper mache on top of the plaster cloth, this will create a more solid structure. Let it set overnight.
Step 6:
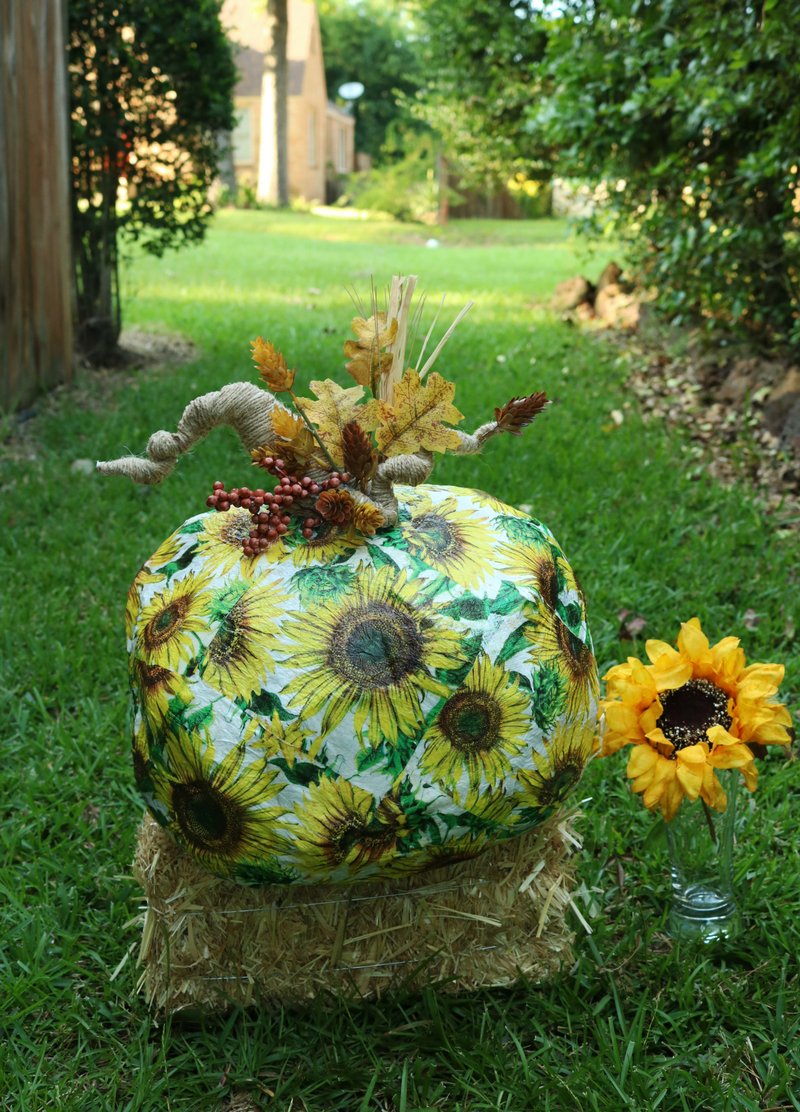
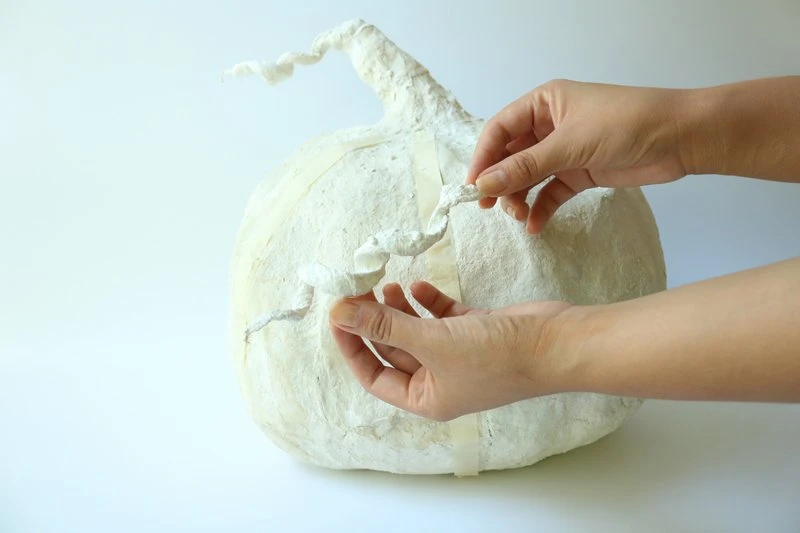
You can make extra details for the pumpkin like this vine
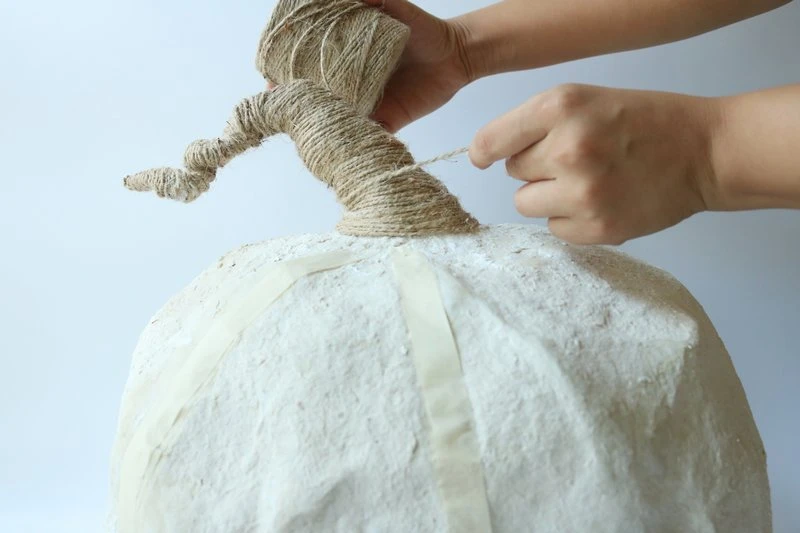
Step 7:
Use Mod Podge and a paint brush for glueing jute cord over the stem and the vine.

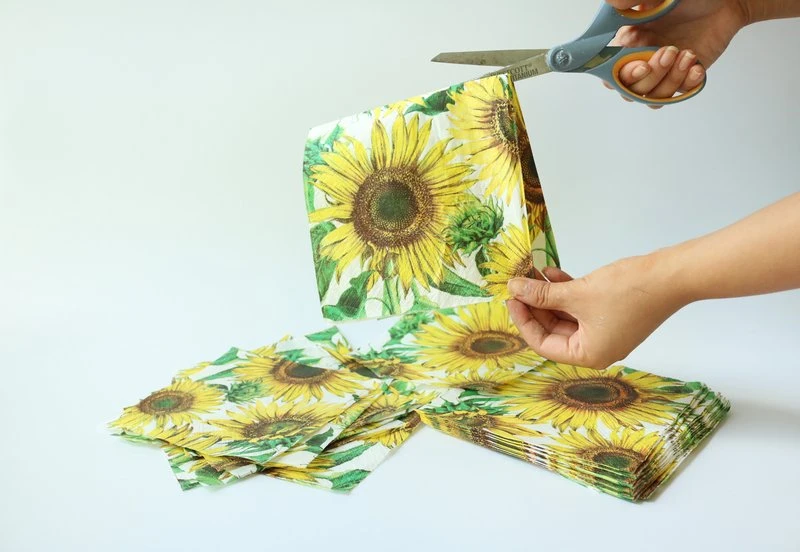
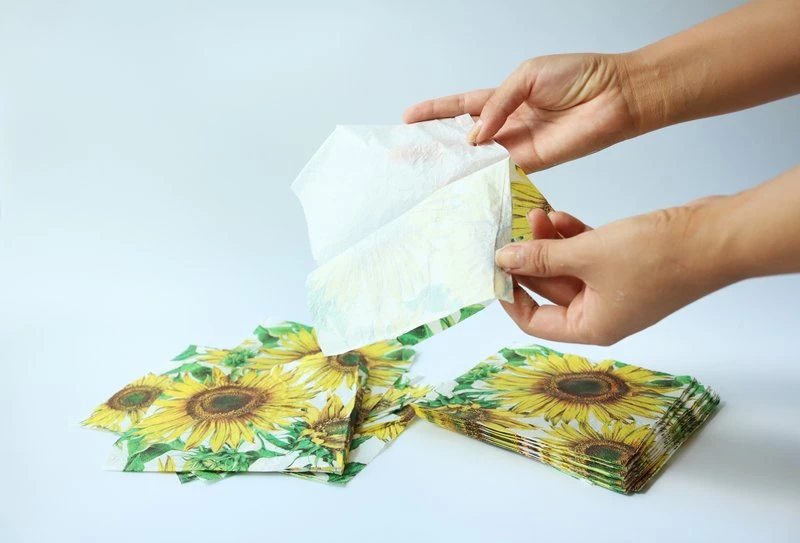
Step 8:
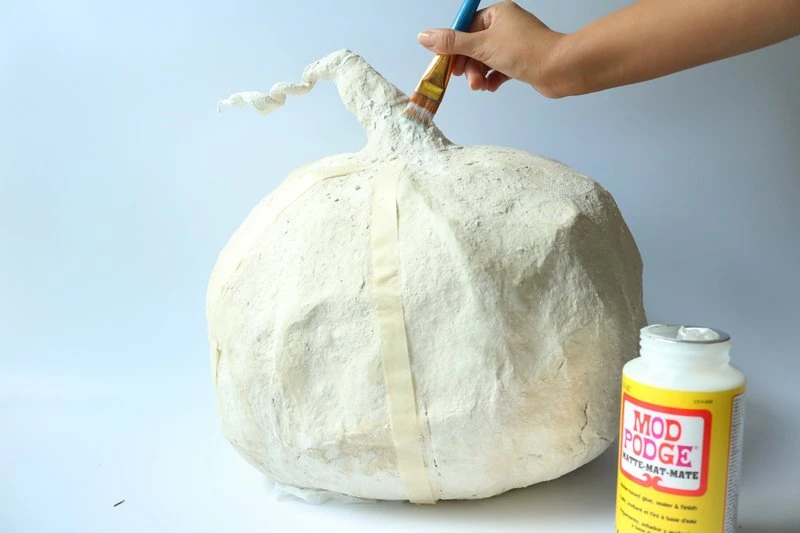
Time to start the decoupage process, cut the napkins in squares, if they come with an extra layer of paper, remove it carefully.
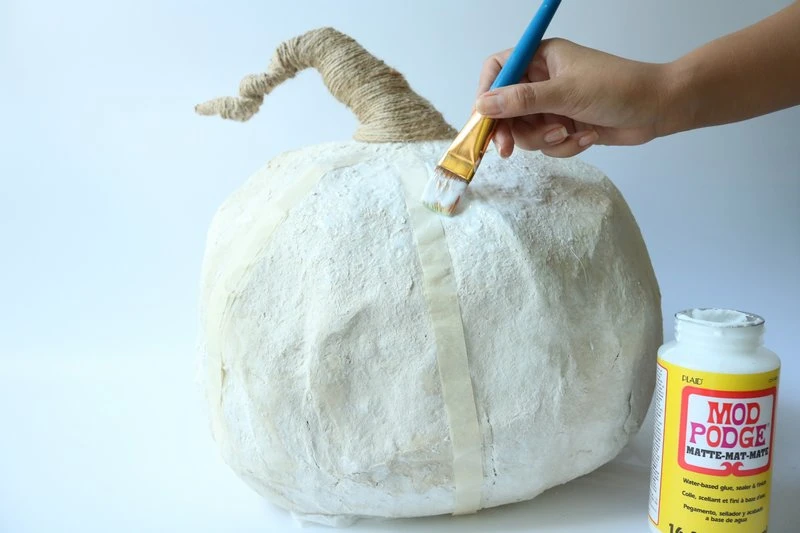
Step 9:
Apply a medium coat of Mod Podge to the surface, too little Mod Podge and you will get wrinkles - you can always wipe away excess Mod Podge, place one napkin on top of the Mod Podge: let it dry for 15 minutes, when ready, use a paint brush or sponge to add another coat of Mod Podge on top. Repeat until you cover the pumpkin fully.
Step 10:
When the decoupage process it’s finished, let it set overnight. Your pumpkin is ready!