Project by Audrey Lozano for ACTÍVA Products.
Preserve those special flowers forever! This easy project will allow you to design a centerpiece for your living room, dinner party, or wedding with natural flowers and colored sand!
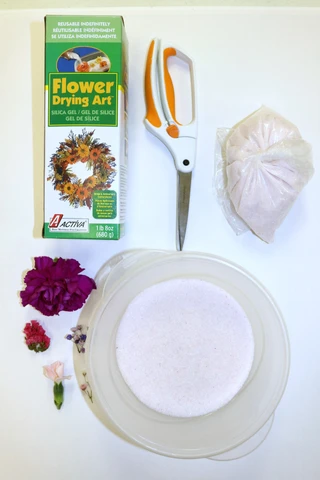
SUPPLIES NEEDED
- ACTÍVA Flower Drying Art silica gel
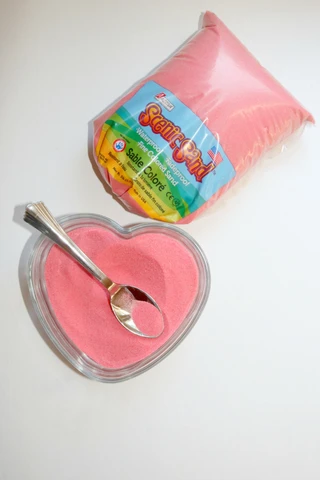
- ACTÍVA Scenic Sand in Pink or the color of your preference
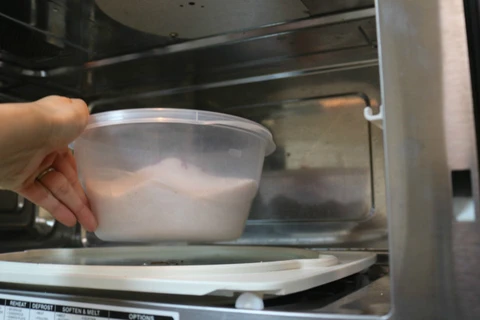
- A microwaveable dish
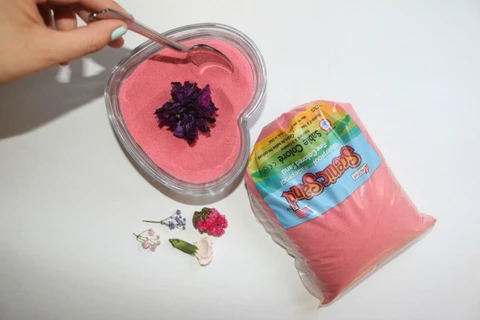
- Natural flowers
- A spoon
- A glass vase or container (here we used one from a dollar store)
INSTRUCTIONS FOR MAKING A DRIED FLOWERS AND COLORED SAND CENTERPIECE
STEP ONE: Read and follow the instructions in the package of ACTÍVA Flower Drying Art :
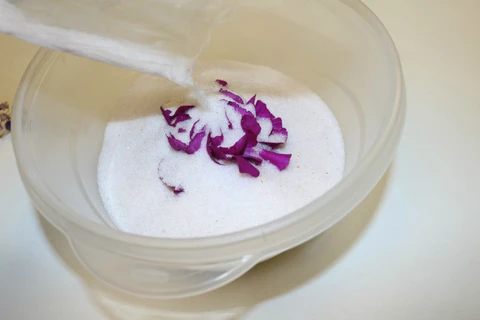
1.1 Pour the Flower Drying Art silica gel into the container to a depth of 1 ½" to cover the bottom. Cut flower stems to about 1 ½". Place flowers face up on the surface of the Flower Drying Art. Space the flowers so they do not touch each other.
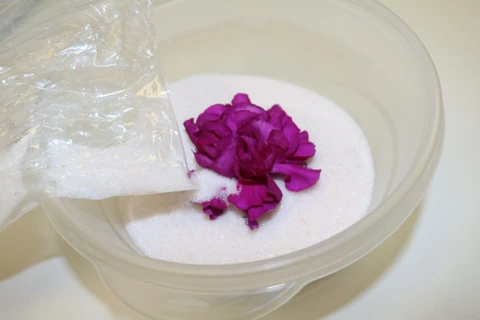
1.2 With a spoon slowly sprinkle more Flower Drying Art around the base of the flowers, adding it to the top and sides of the flowers. Be careful to support fragile petals with the Flower Drying Art before covering the top of the blossom. Make sure all parts of the flowers are covered with a generous layer of Flower Drying Art.
1.3 Leave the container uncovered and place in the microwave (in a microwave dish) with a glass of water, and heat on medium power in one minute increments until the flowers are dry. (See chart in the box of Flower Drying Art for more information.)
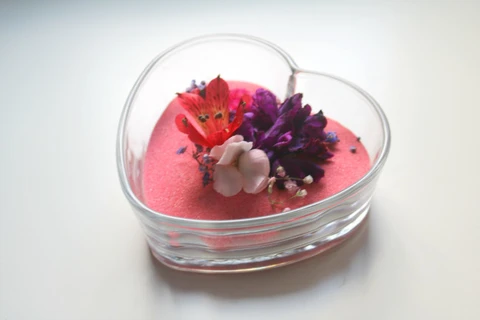
STEP TWO: Prepare the glass vase or container by sprinkling Scenic Sand in the color of your choice into it. We suggest about 1 inch or more.
STEP THREE: Take the container out of the microwave. To remove the flowers, slowly pour out the Flower Drying Art product until the blossoms are uncovered. Gently shake away any Flower Drying Art that may remain on the petals. A few grains of Flower Drying Art may be left in the center of heavy flowers to aid in protecting them from room humidity.
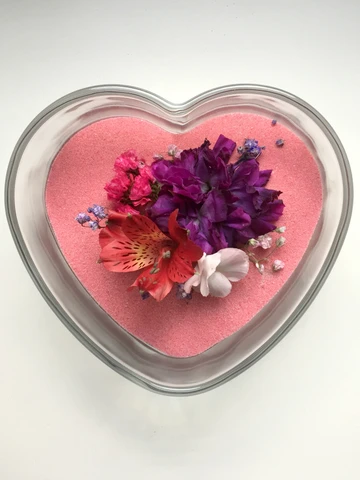
STEP FOUR: Place the flowers on top of the Scenic Sand in the glass container.
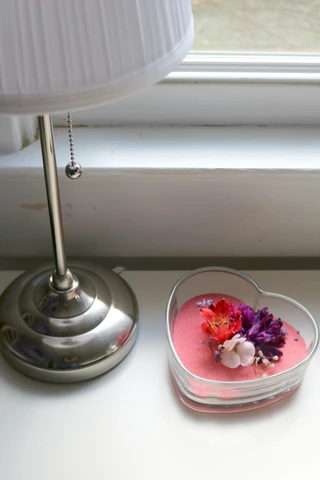
Decorate as shown in the photos, or get as creative as you want! The possibilities are endless!

Don't forget to stop by our online shop to purchase Flower Drying Art and Scenic Sand! And visit our Projects Gallery for more creative ideas!