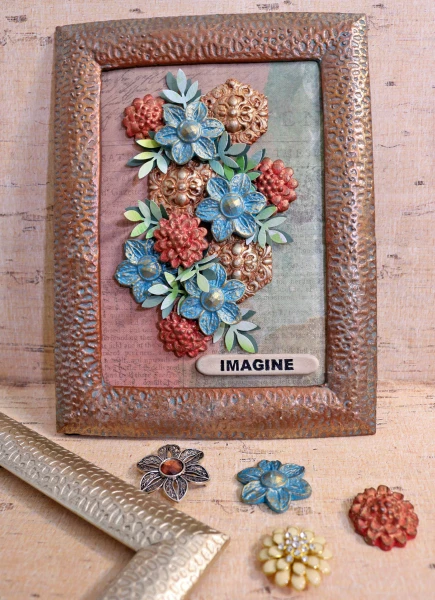
Project by Barbara Rankin of Black Hole Art Studio.
Use thrifted or craft store jewelry and an old frame to create a beautifully framed inspirational home decor piece with InstaMold and PermaStone! This piece is easily customizable to suit your tastes; simply modify paint colors and finishes as you like!
Supplies Needed to Make Floral Artwork
- InstaMold from ACTÍVA Products
- PermaStone from ACTÍVA Products
- 5x7 Photo Frame
- Acrylic Paint (colors used: Copper, Turquoise, Titanium White, Quinacridone Magenta, Yellow Oxide, Burnt Sienna, Interference Gold, Titan Buff Patina Green Antiquing Cream)
- Metallic Waxes (colors used: Vintage Gold, Aged Brass, White Gold, Bronze Age, Copper)
- Frayed burlap Distress Ink
- Foam sponge applicator
- Polymer gloss medium or varnish
- White gesso
- Assorted brushes
- Word stamp
- Black archival ink pad
- Leaf punch
- Green card stock
- Green decorative print paper
- Black chipboard
- White tacky glue
- Foam dots
How to Make Floral Artwork With InstaMold and PermaStone
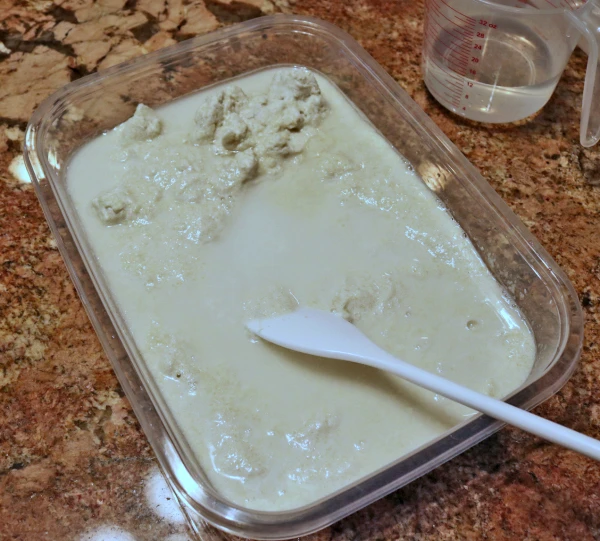
STEP ONE: Mix the InstaMold compound according to package directions directly in your plastic container.
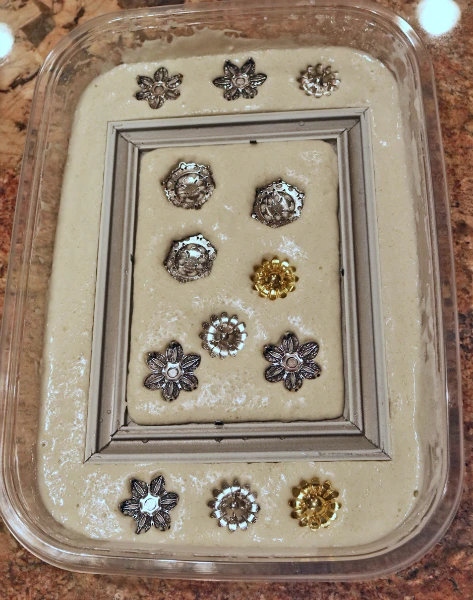
STEP TWO: Push frame into InstaMold until the compound is just above the back of the frame. Add jewelry pieces into the open areas until the compound is just above them. Allow InstaMold to set before removing the frame and jewelry pieces.
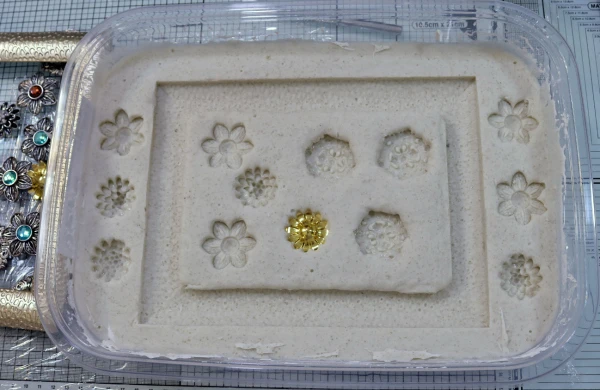
STEP THREE: Remove frame and jewelry pieces from the compound. Items should release cleanly from the InstaMold.
STEP FOUR: Mix PermaStone according to package directions. Fill each opening with the PermaStone and allow to set up.
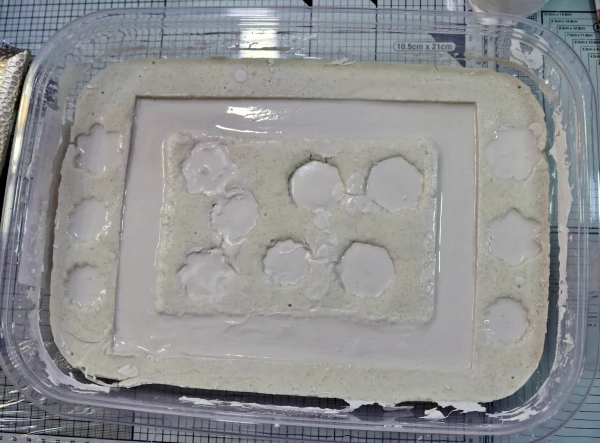
STEP FIVE: Carefully remove frame and embellishments from InstaMold.
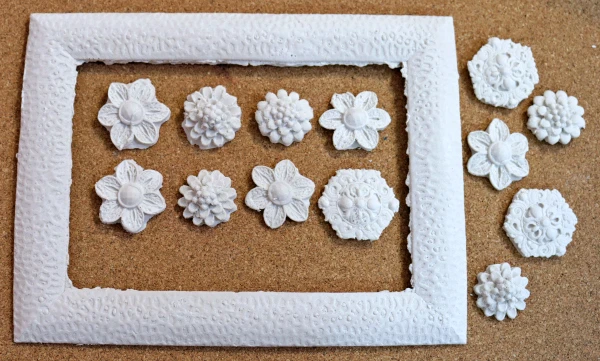
STEP SIX: Place a piece of sand paper on a flat surface and rub your pieces over it to remove any imperfections or to level the bottom of a piece.
STEP SEVEN: Sand edges of frame with sandpaper. An emery board works really well for getting into the corners.
STEP EIGHT: Paint front and back sides of frame with copper acrylic paint. Let first coat dry, then add a second coat.
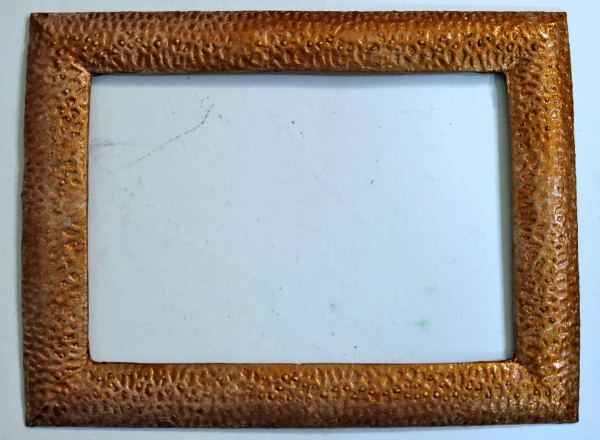
STEP NINE: For added protection, brush polymer gloss medium or varnish over front and back of frame, let dry.
STEP TEN: Brush Patina Green Antiquing Cream over front of frame and let dry.
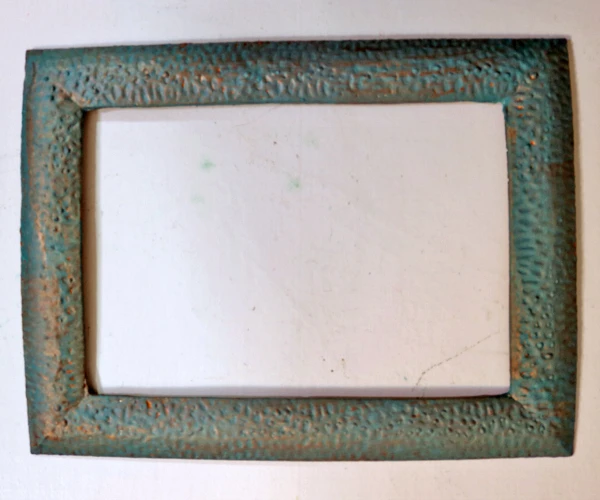
STEP ELEVEN: Use a damp baby wipe or paper towel to remove as much or as little of the antiquing cream as desired.
STEP TWELVE: Rub copper metallic wax over the high spots on the frame to highlight and intensify the details. Rub White Gold metallic wax along the outer edge of the frame to intensify the shine. Let paste dry, then buff with a soft cloth.
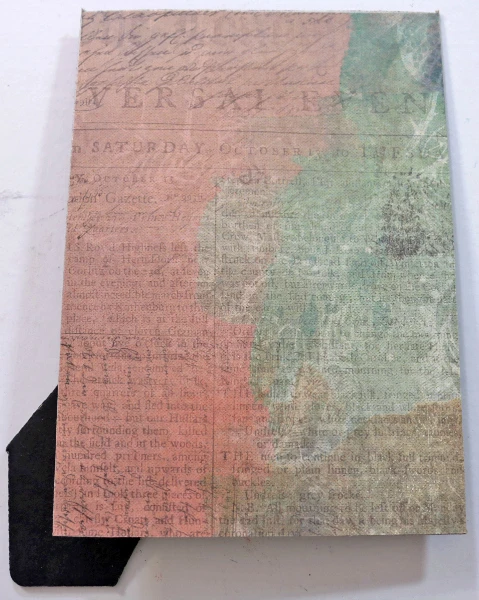
STEP THIRTEEN: Cut a piece of decorative scrapbook paper to fit the easel back from the original frame. Adhere to the front of the easel back, as shown.
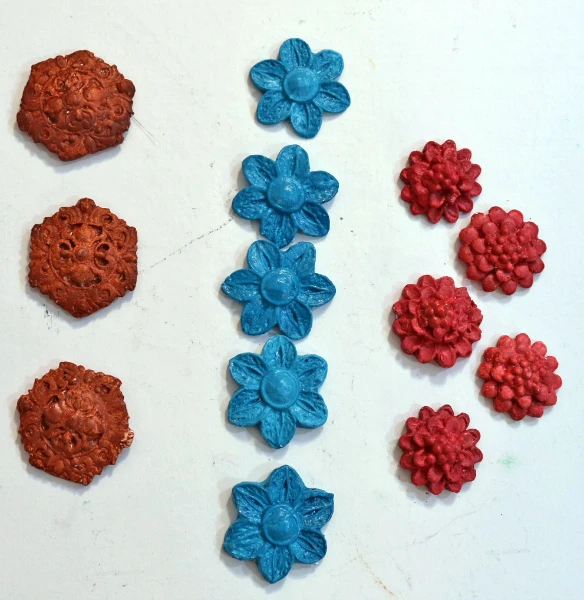
STEP FOURTEEN: Prime each embellishment piece with white gesso, let dry. Set aside.
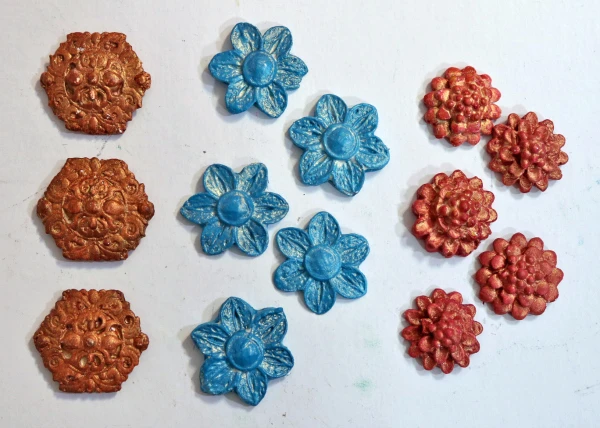
STEP FIFTEEN: Paint five embellishments with Quinacridone Magenta and Yellow Ochre (right) mixed together. Paint five more embellishments with Turquoise (Phthalo) and Titanium White (middle) mixed together. Paint the three medallion pieces with Burnt Sienna (left). Let dry.
STEP SIXTEEN: Brush Interference Gold paint over each embellishment and wipe off excess paint, as shown.
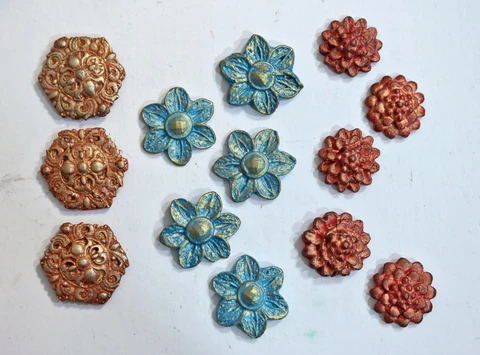
STEP SEVENTEEN: Using your finger, pick up Bronze Age metallic wax and hit the high spots on each of the red flowers (right) to add highlight and depth. Repeat this procedure using White Gold metallic wax on the brown medallions (left), and Vintage Gold metallic wax on the blue flowers (middle).
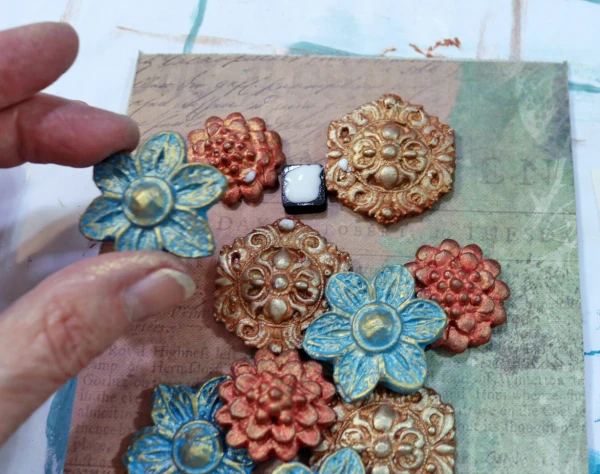
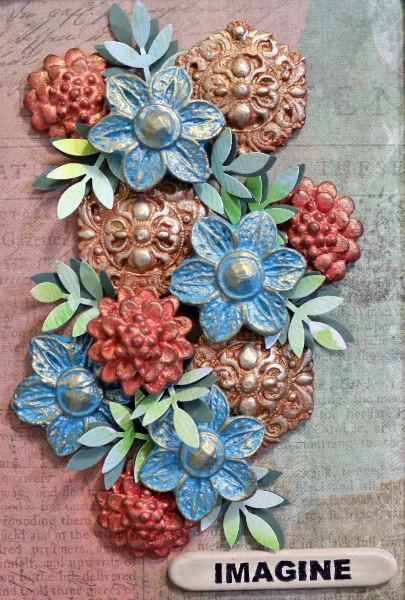
STEP EIGHTEEN: Use a fast grab white glue to adhere each embellishment to the base. Layer foam dots two or three high between flowers to allow top flower to be glued to a level surface, as shown.
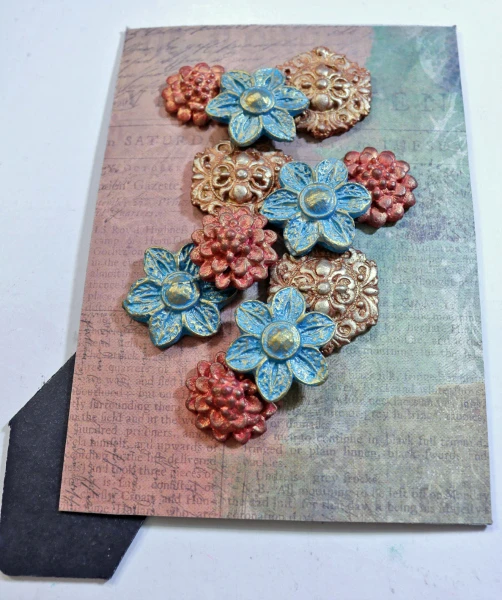
Your backing piece should look something like this.
STEP NINETEEN: Add a bead of white glue around edge of easel base.
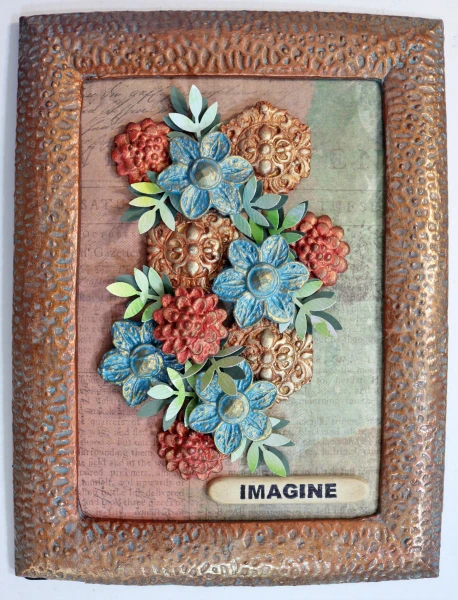
STEP TWENTY: Center easel base into frame, as shown. Set aside to allow glue to dry.
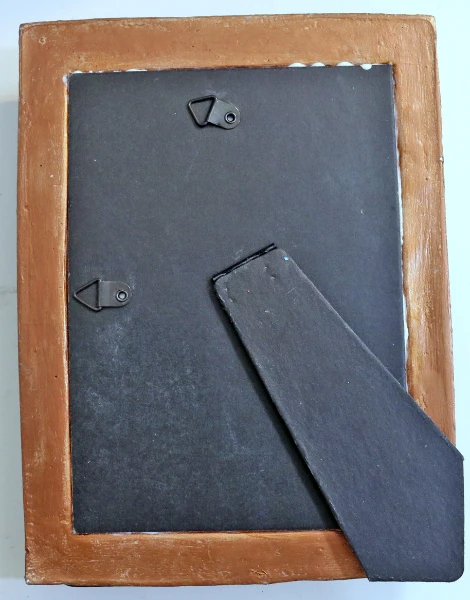
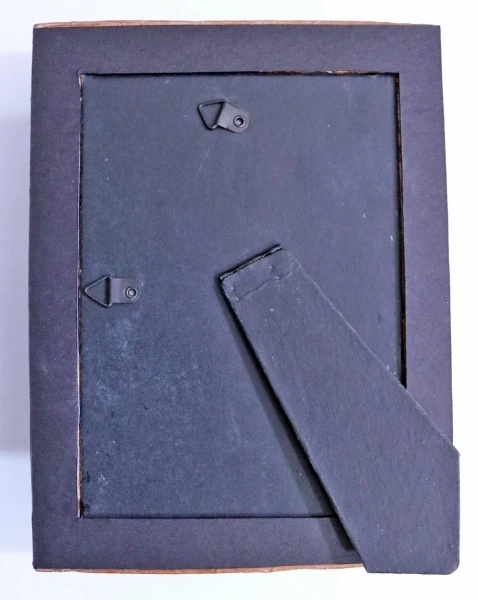
STEP TWENTY-ONE: To give the back of the frame a finished look, cut a piece of chipboard the same size as the frame and adhere to back of frame, as shown.
STEP TWENTY-TWO: Pour PermaStone into product packaging from word bands or similar packaging to make stone strips. Let dry. You will only need one strip for this project.
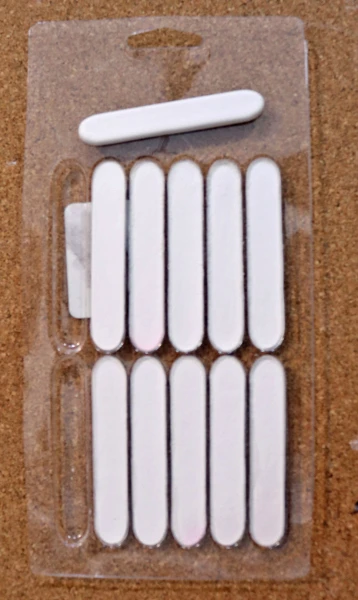
STEP TWENTY-THREE: Prime one strip with white gesso, let dry. Paint strip with Titan Buff acrylic paint, let dry.
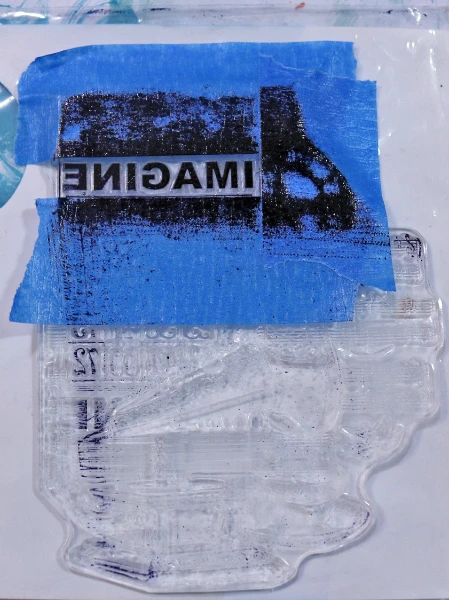
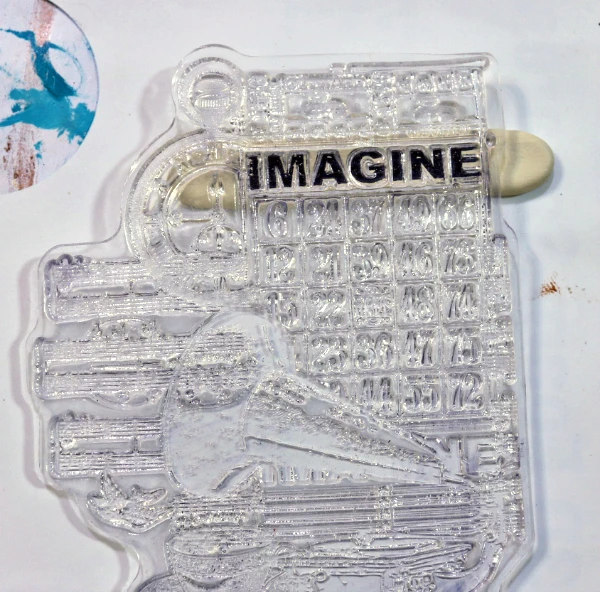
STEP TWENTY-FOUR: Use a single word stamp, or if your word is combined with other images, tape off the area around the word with masking tape, as shown. Then ink up the word with black archival ink. Remove masking tape.
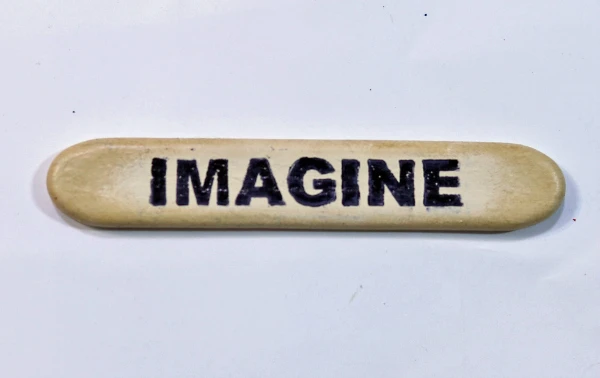
STEP TWENTY-FIVE: Center and stamp word IMAGINE onto strip. Let ink dry.
STEP TWENTY-SIX: Distress edge of strip with Frayed Burlap distress ink and a foam sponge. If you need to make any touchups, you can use a black Sharpie marker to fill in any missed stamping.
STEP TWENTY-SEVEN: Punch several leaves from a dark green card stock, and the same amount from a separate piece of green multi card stock.
STEP TWENTY-EIGHT: Adhere leaves between floral embellishments, adhering the dark green leaves first, then the multi green leaves on top, as shown. This will give a shaded effect. Adhere word strip to base with white glue, as shown.
And with that, you have beautiful floral artwork that you will cherish for years to come!
Don't forget to shop for InstaMold and PermaStone in our online store, and check out other casting project ideas here!