Project by Lisa Marie Jimenez.
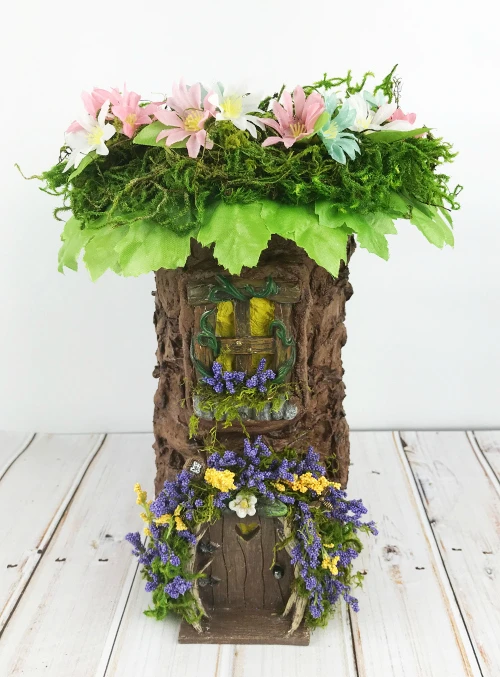
Plain glass florist vases are a common thrift store find. Transform them into absolutely stunning decor with this breathtaking fairy garden tree vase project! Learn how to use Rigid Wrap plaster cloth and Hearty Clay air dry clay to create a magical fairy garden scene that multitasks as a flower vase.

Supplies Needed to Make a Fairy Garden Tree
- ACTÍVA Rigid Wrap
- ACTÍVA White Hearty Clay
- ACTÍVA Clay Roller Kit
- Acrylic Paint: Brown, Dark Brown, Cream
- ColorBox® ColoriQue: Moss Landing, Honey Bee
- Large Glass Vase
- Assorted Miniature Flowers
- Miniature Door & Window
- Assorted Small Rubber Stamps
- Small Round Cutter
- Raw Wood Plaque
- Assorted Fairy Miniature items
- Wire - 18 Gauge
- Glass Bowl & Water
- Scissors
- Wire Cutters
- Paint Brushes
- Glue
How to Make a Fairy Garden Tree
Step One: Form the Tree
Cut the Rigid Wrap in strips 1.5 times the length of the vase. Soak the Rigid Wrap in warm water. Remove a strip from the water and remove some of the excess water. Lay the strip on the vase going from top to bottom. Scrunch the Ridge Wrap to fit the vase. Repeat this step until the entire vase is covered.
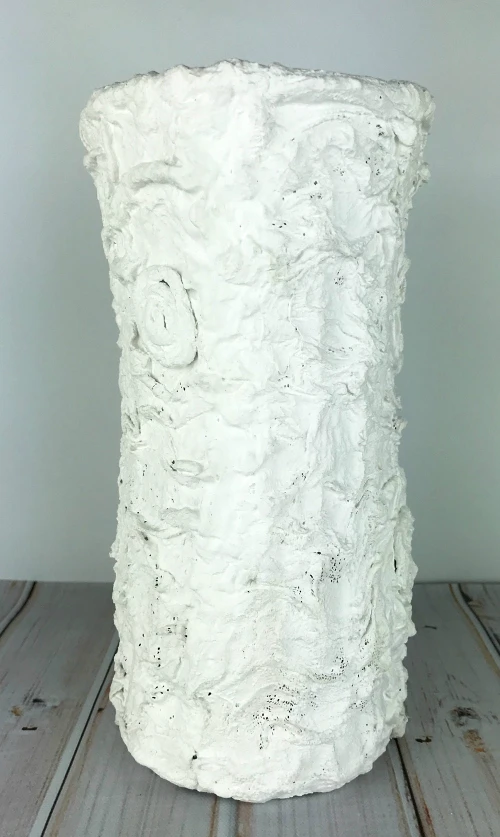
Cut a strip of Rigid Wrap, then soak. Remove from water and twist the wrap and then curl the strip to for a “knot” for the tree. Place on top of the wrap already on the vase. Add several of these to the vase.

Let the Rigid Wrap completely dry. Next glue the miniature door and window to the vase. Set aside to dry. When the window and door are completely dry, add Rigid Wrap around the edges of them to blend into the existing wrap.
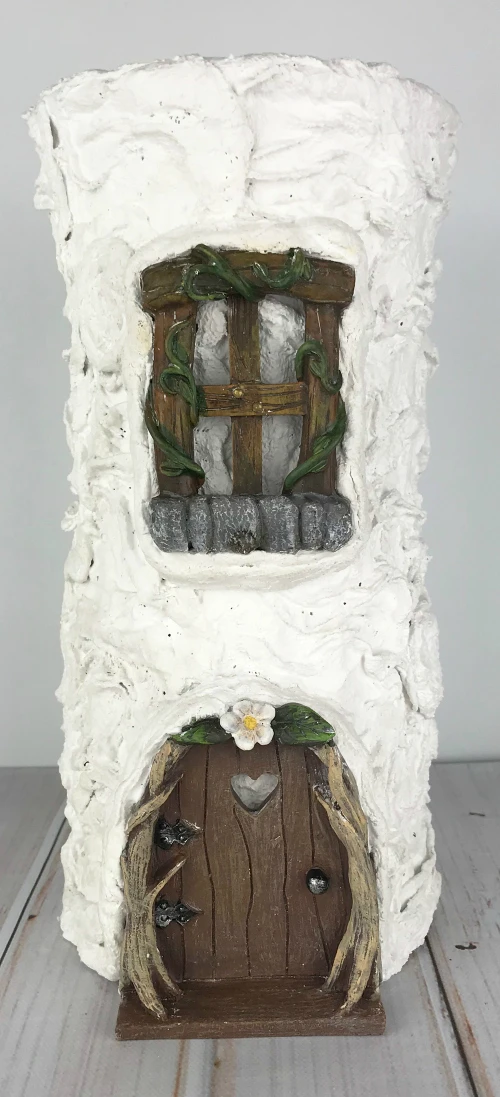
Paint the Rigid Wrap with brown paint. Add dark brown to sections to create a contrast. Lightly dust sections of the brown paint with a cream color to accent.

Paint the inside of the window and heart cut out on the door with ColoriQue Honey Bee. Adorn the door and window with flowers.
Step Two: Form the Tree Topper
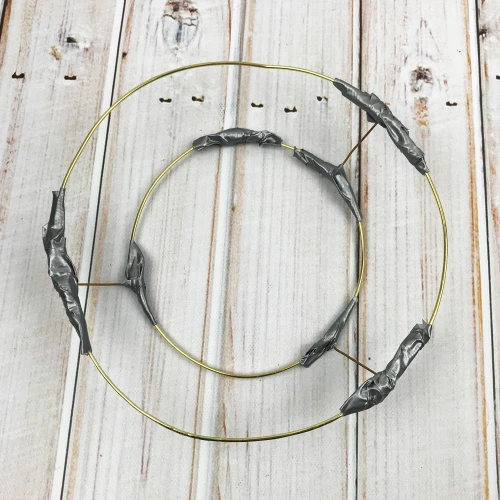
Cut a strip of wire that is a little wider than the opening of the vase. Cut a second strip that is several inches larger than the first wire. Follow the picture for assembly to form the cap for the tree.
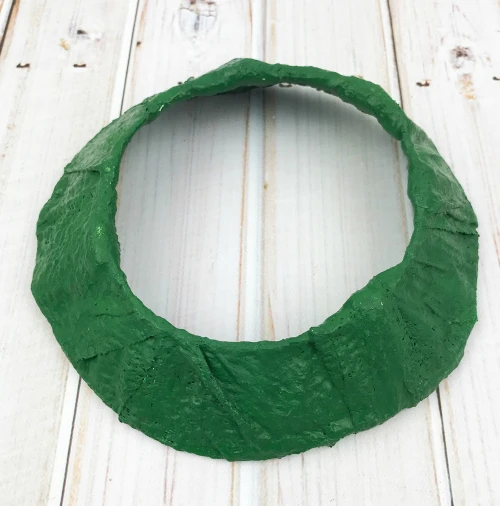
Use Rigid Wrap to cover the wire form.

Once the Rigid Wrap is dry, color with ColoriQue Moss Landing. Then cover the form with silk leaves and flowers.
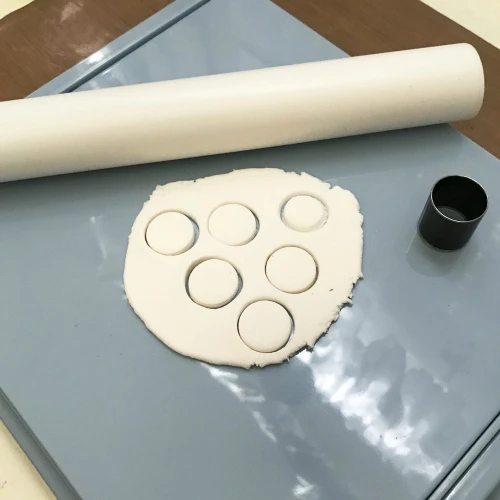
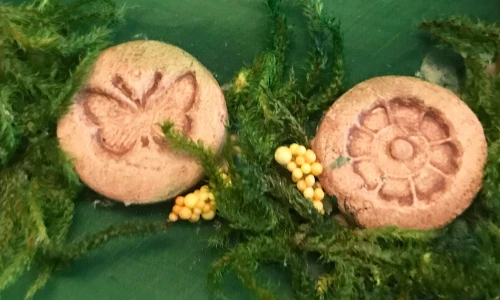
Step Three: Make the Stepping Stones
Roll out the Hearty Clay using the Clay Roller Kit. Use a round cutter to cut out the small circles.
Next use small rubber stamps to press designs into the circles. Set aside to dry. When dry paint with cream paint and accent the impression with brown paint.
Step Four: Assemble
Place the tree vase onto a wood plaque and add assorted fairy garden accessories to complete your scene.

The fairies will be visiting your magical vase in no time!