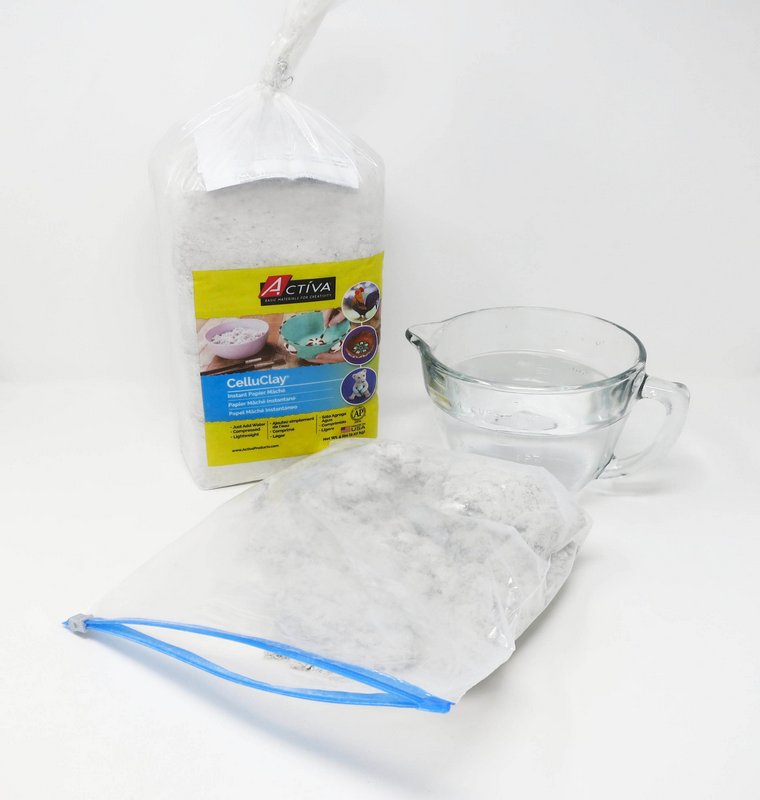
Materials Needed:
- Activa White CelluClay
- Water
- Zip top bag
- Styrofoam spheres, foam, foam core board
- Serrated knife
- Toothpicks
- Sandpaper
- Colored tissue paper
- Scissors
- Varnish
- Acrylic Paint
- Paint Brush
- Glue
- Snow glitter
- Felt or ribbon
- Buttons
Step 1
Prepare the CelluClay
Mix the CelluClay according to package directions.
Add 32oz. of warm water to 1 lb. of CelluClay, mixing in a zip top bag.
Knead with fingers until CelluClay reaches the consistency of clay or stiff dough with no dry spots.
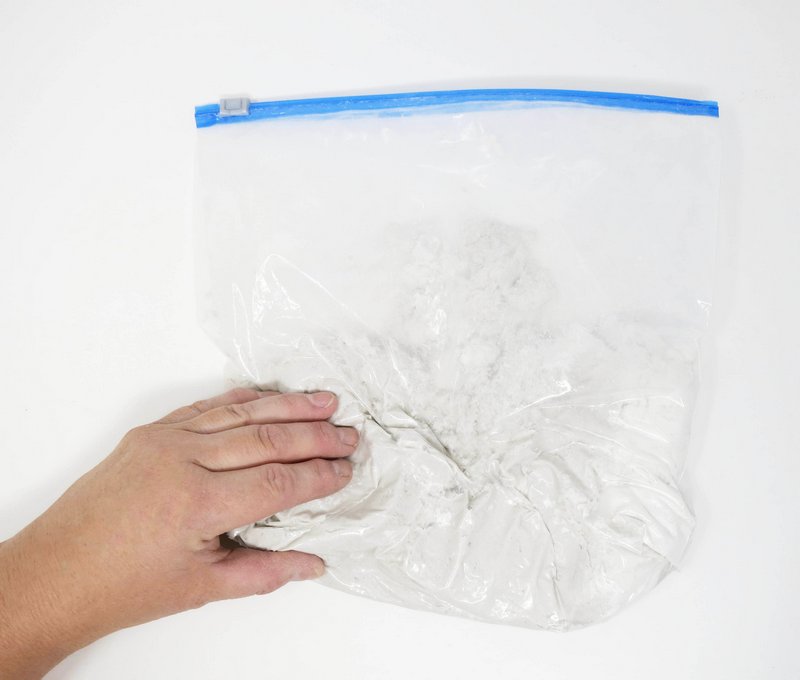
Add more dry CelluClay if mixture is too wet or soft, and more water if CelluClay if too dry or stiff.
Remove CelluClay from bag when done mixing.

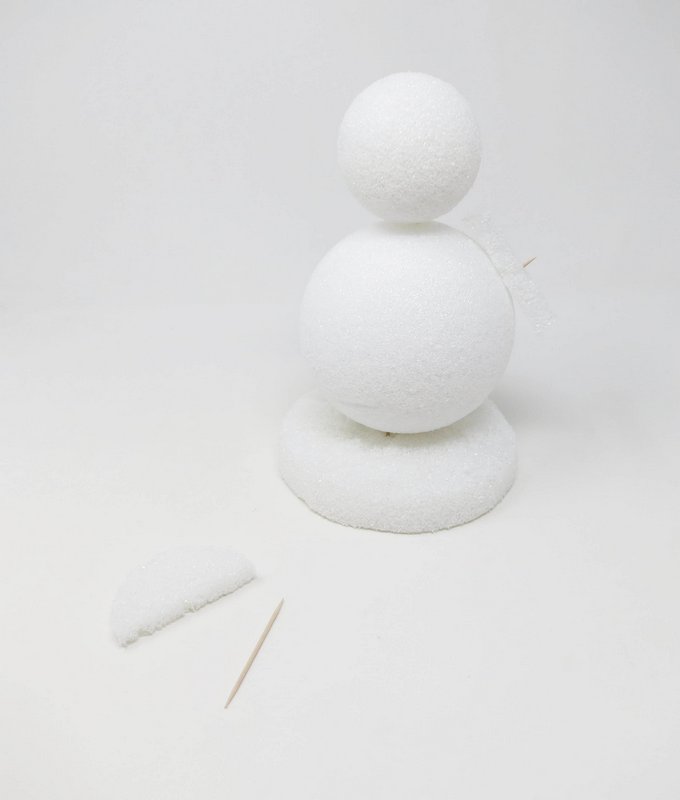
Step 2
Armature
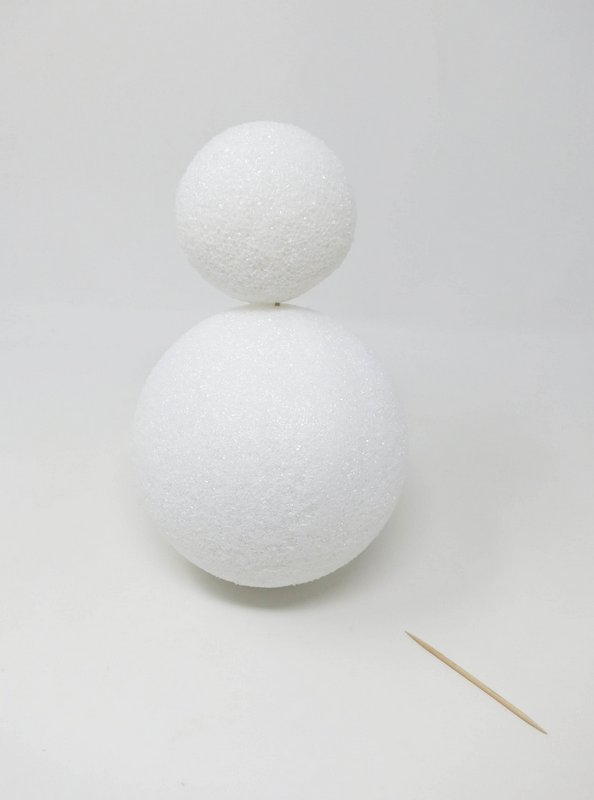
Build an skeleton structure for the snowman’s body using styrofoam spheres.
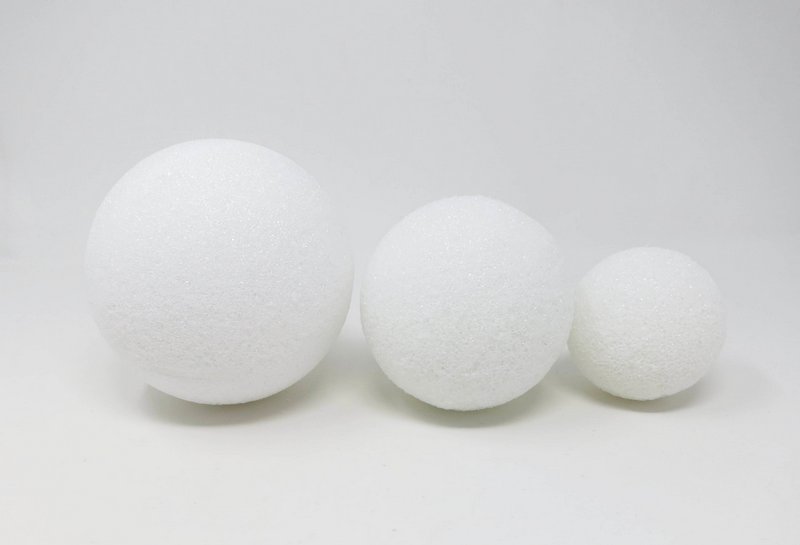
One large sphere for the body and a small one for the head.
Attach the styrofoam forms together with a toothpick.
Use a half extra large styrofoam sphere for the base.
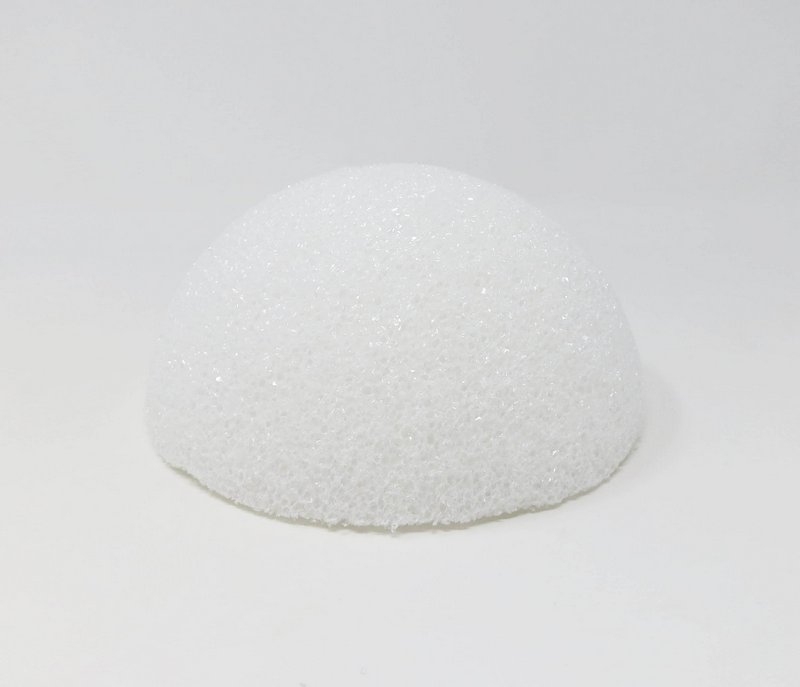
Trim the top of the form using a serrated knife to create a flat surface.
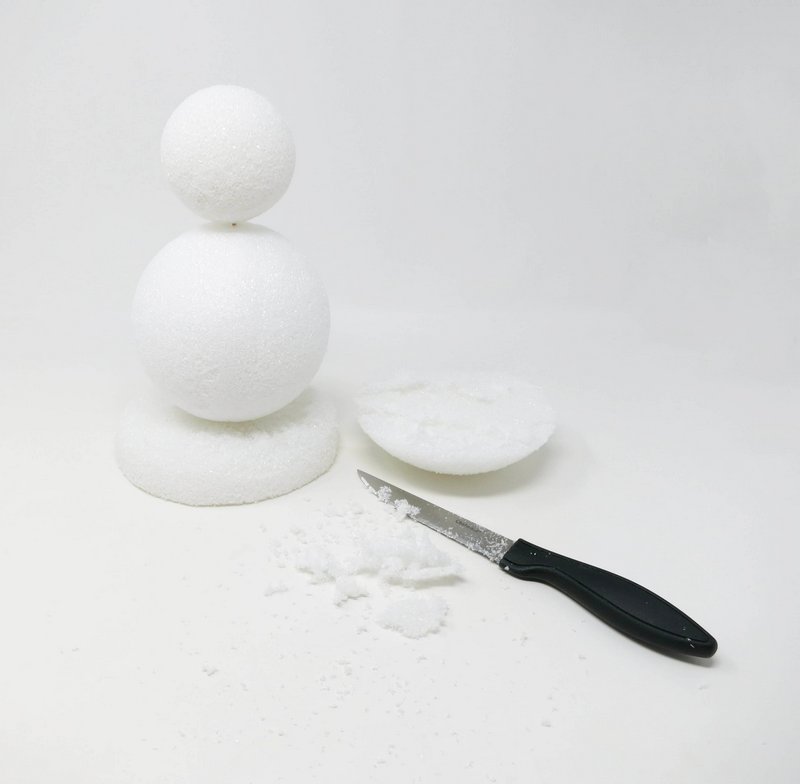
Attach the snow base form to the bottom of the snowman’s body with a toothpick.
Divide the medium size styrofoam sphere into quarters.
Attach two of the quarters to the sides of the snowman’s body using toothpicks.
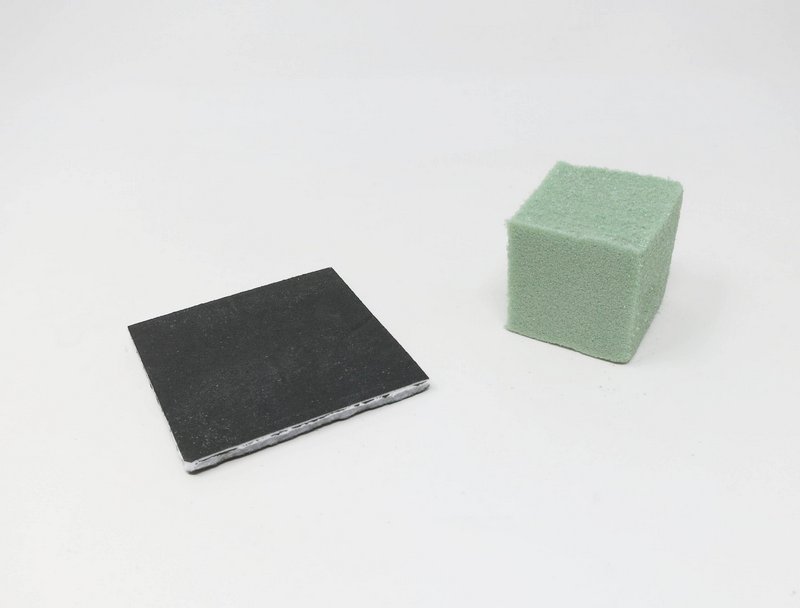
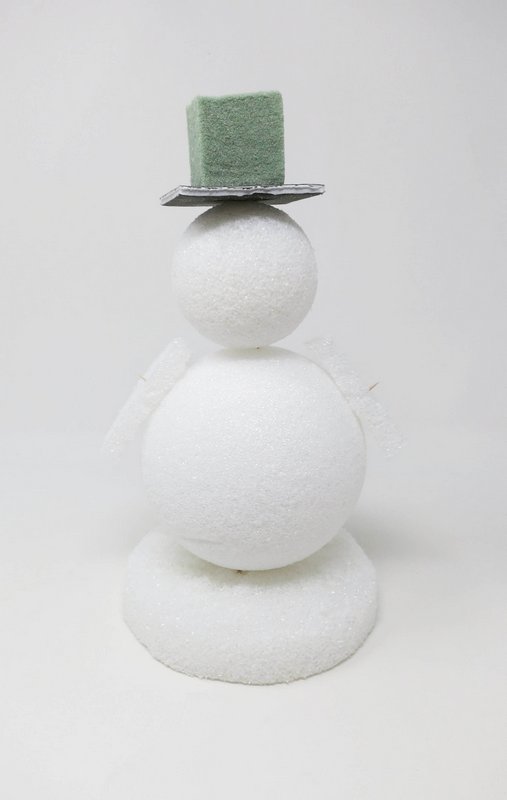
Cut a square out of foam core and a cube out of foam for the snowman’s hat.
Attach the parts of the hat to the snowman’s head with a toothpick.
Step 3
Layer
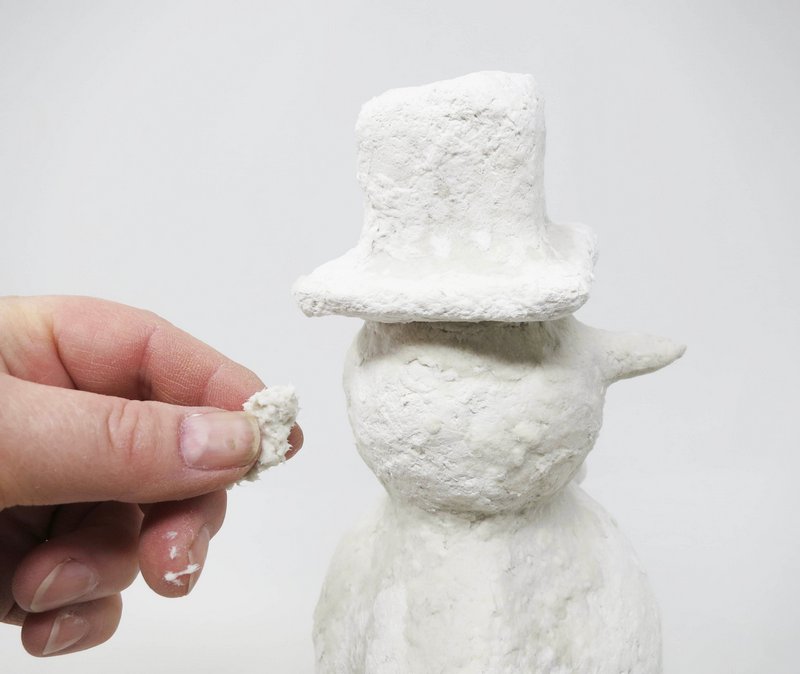
Cover the armature with CelluClay.
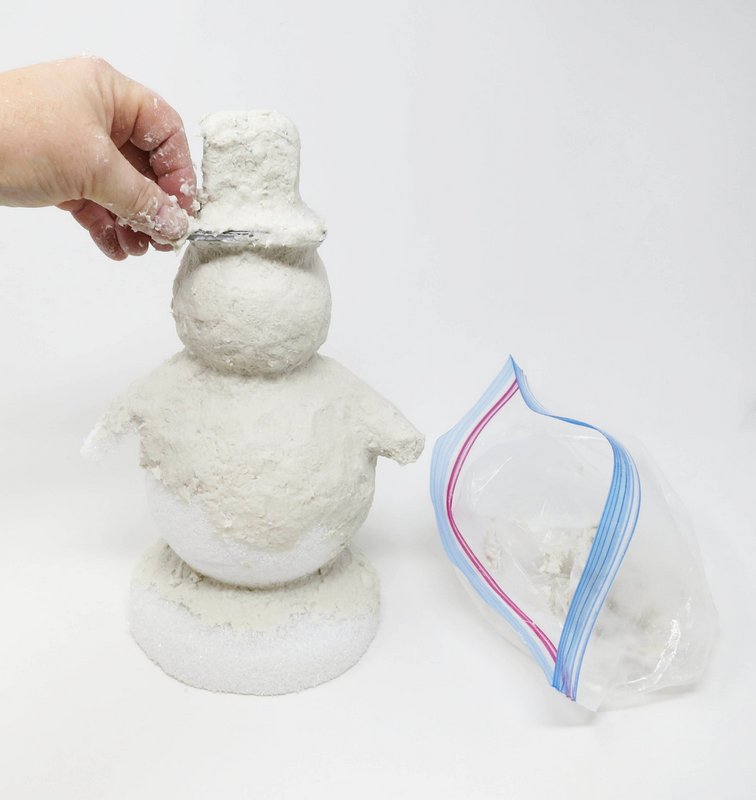
Smooth out any bumps in the CelluClay with wet fingertips.
Apply several coats of CelluClay as needed. Allowing the individual coats to dry in between layers.
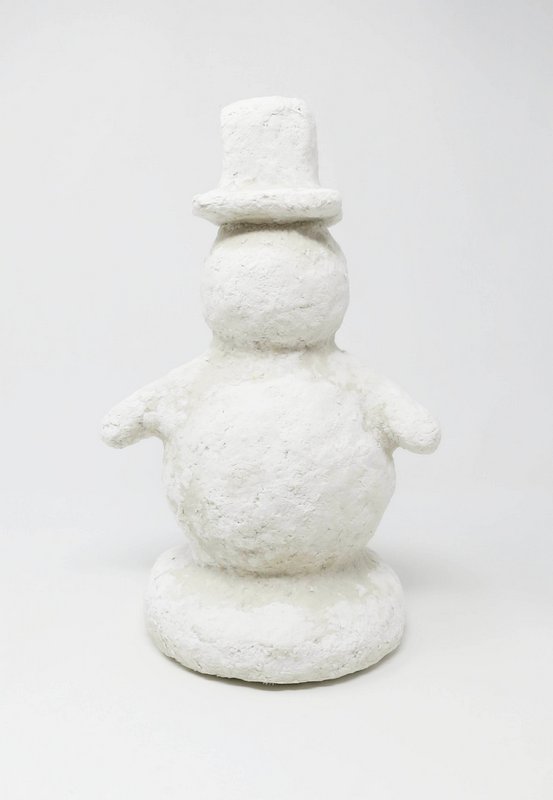
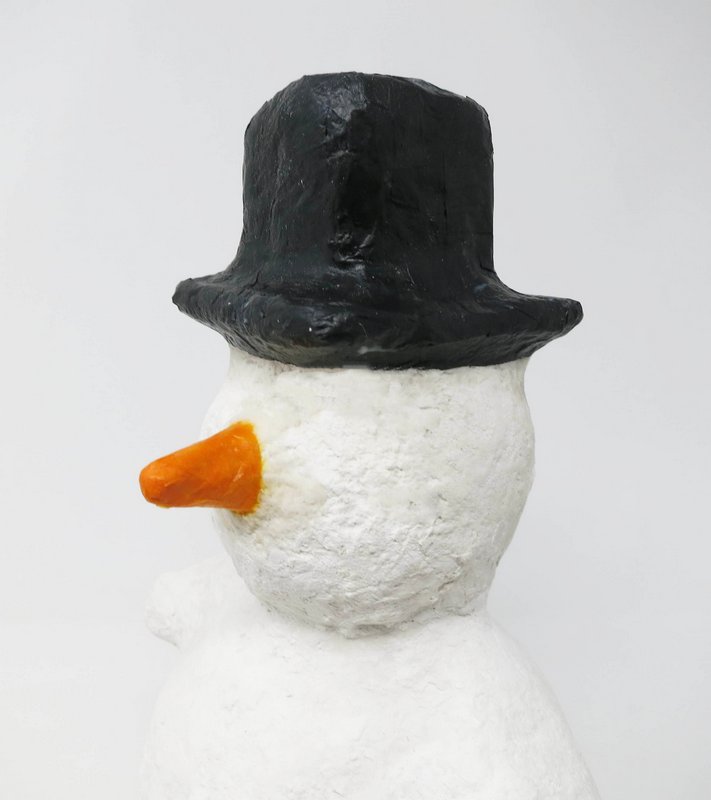
Add additional CelluClay to form a cone onto the face for the snowman’s carrot nose.
Step 4
Dry
Allow the snowman to air dry. Humidity levels will impact drying time.
The CelluClay will lighten in color and become harder as it is drying.
The CelluClay will feel room temperature when dry and have a bright white color appearance.
Step 5
Smooth
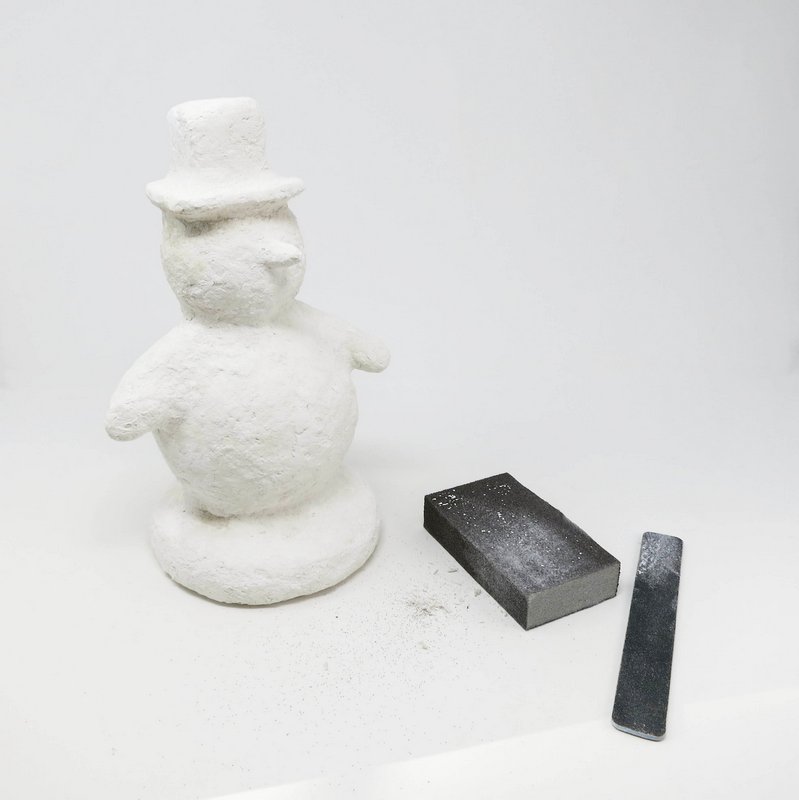
Use sandpaper to smooth out any rough areas or bumps on the sculpture’s surface.
Step 6
Color
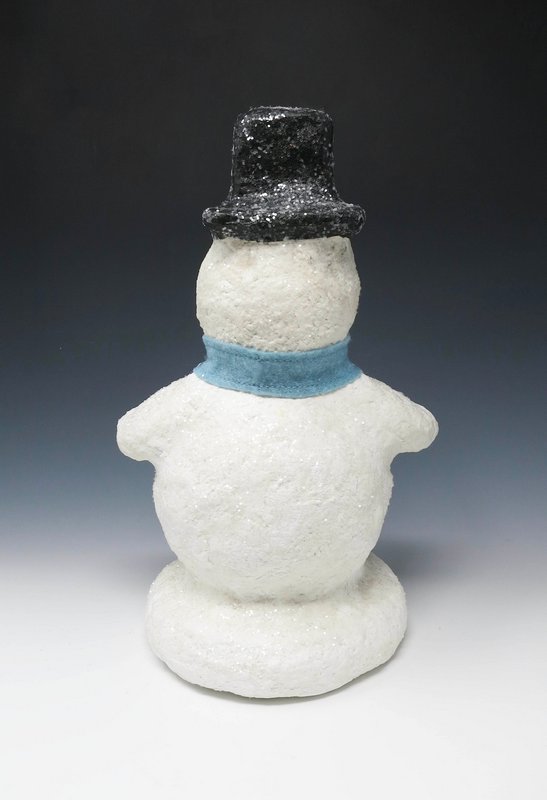
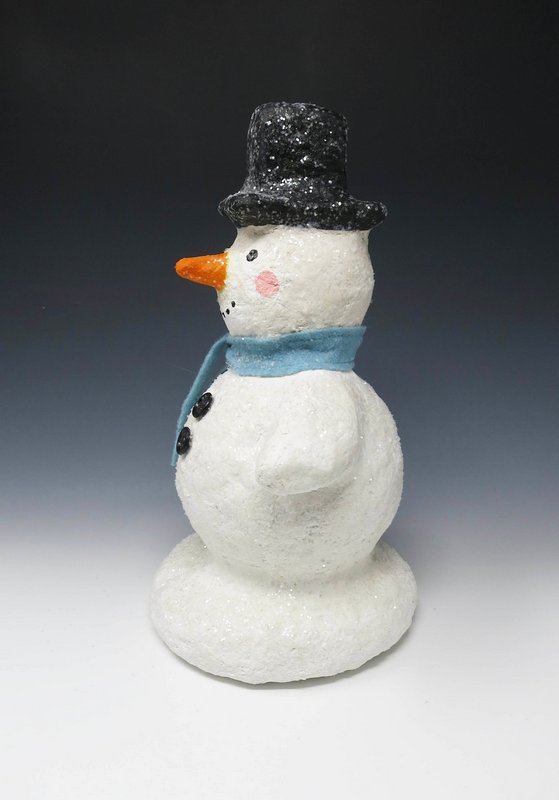
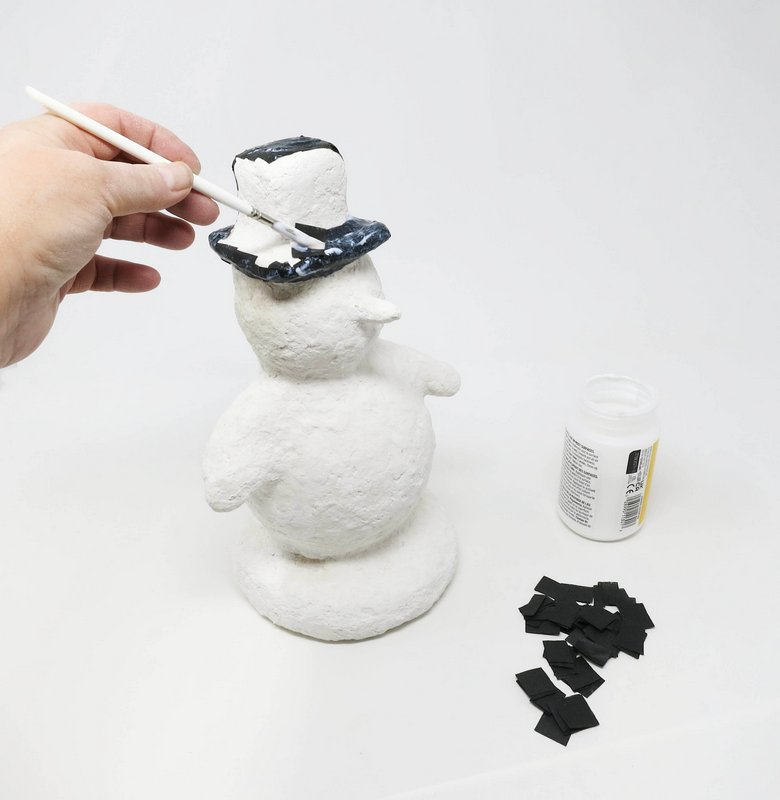
Color can be added to the sculpture using mixed media.
This example uses colored tissue paper for the hat and nose applied with a gloss varnish.
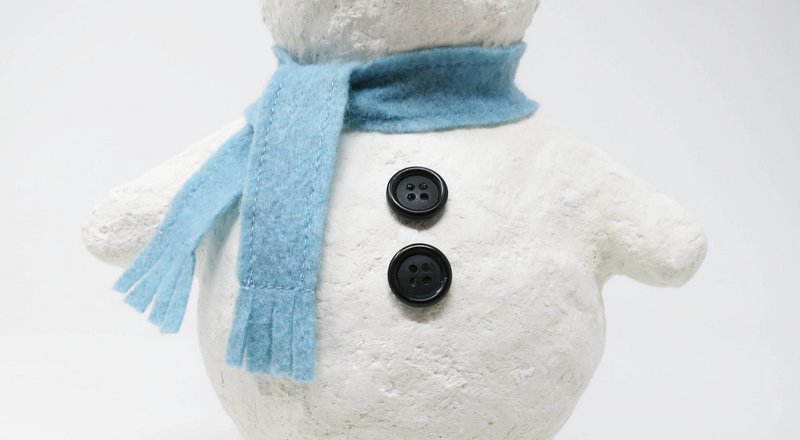
Add material or ribbon for the snowman’s scarf.
Add buttons using glue for the body’s details.
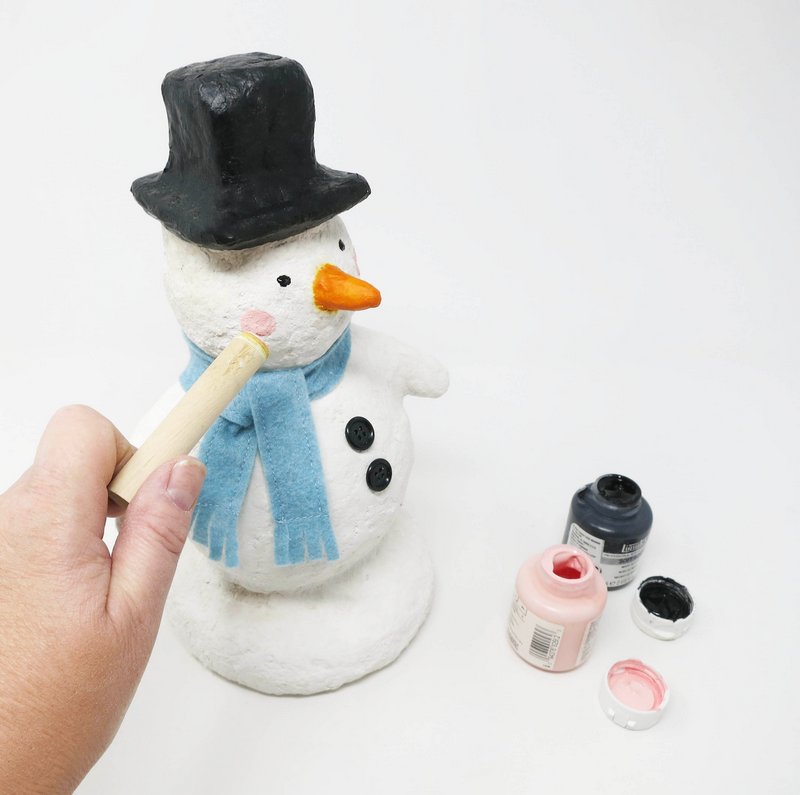
Use acrylic paint to paint the sculpture’s facial features.
Step 7
Snow
Apply glue to the CelluClay surfaces and sprinkle with glitter.
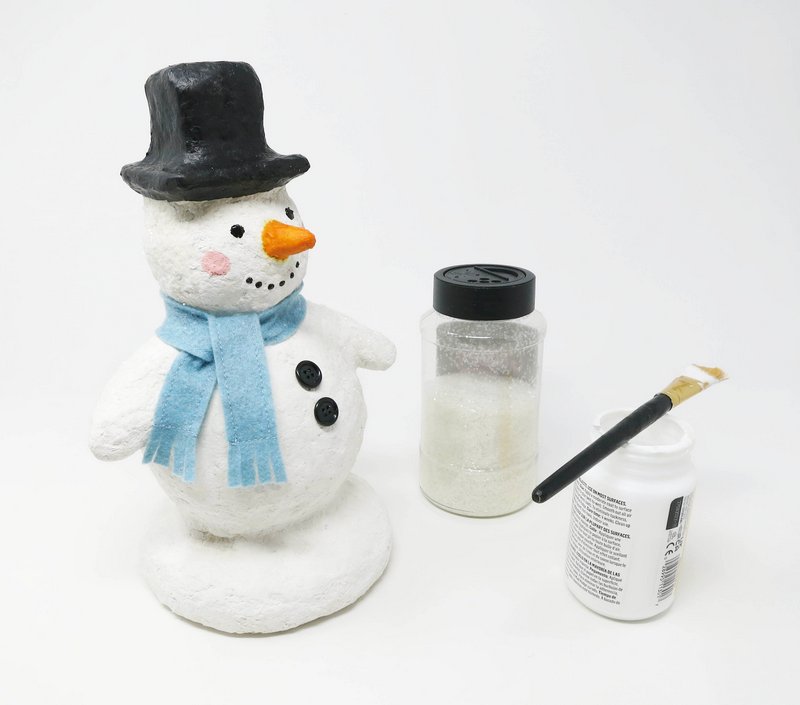
Allow the gluey glitter to dry.