Summary:
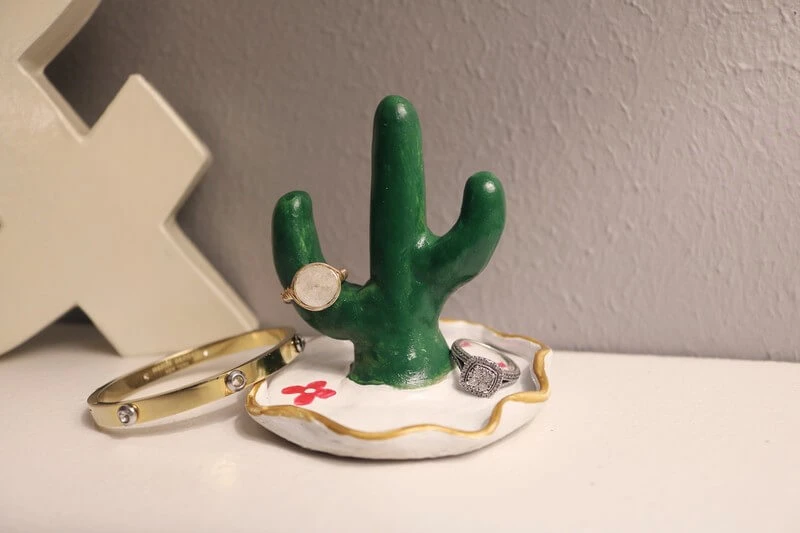
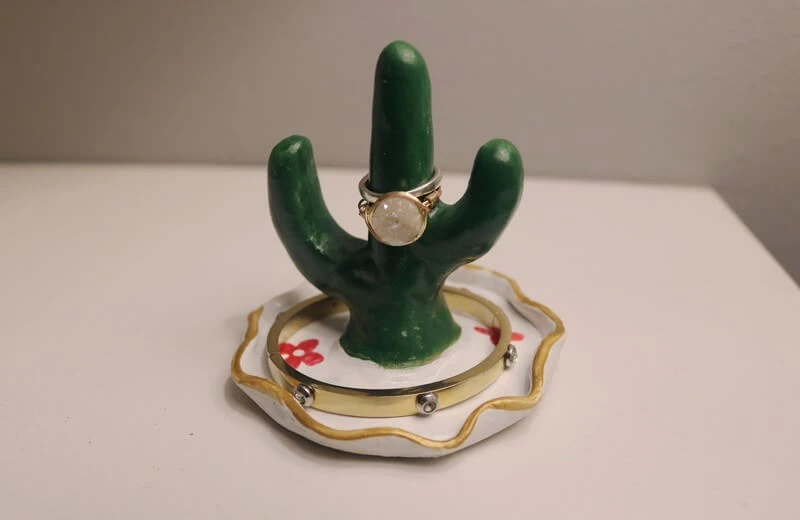
This cute cactus will cleverly hold your rings and other jewelry! Create this trendy, decorative and functional item by using our high quality air dry clay Activ-Clay in color white. This idea is very easy to make and it will look very pretty in your bedroom, bathroom or vanity mirror, you can also make gifts for friends and family, with one package of Activ-Clay 3.3 lbs. You can make up to 4 cactus! (0.82 lb per project) Trust us, if you make this creative project you will never lose your jewelry again!
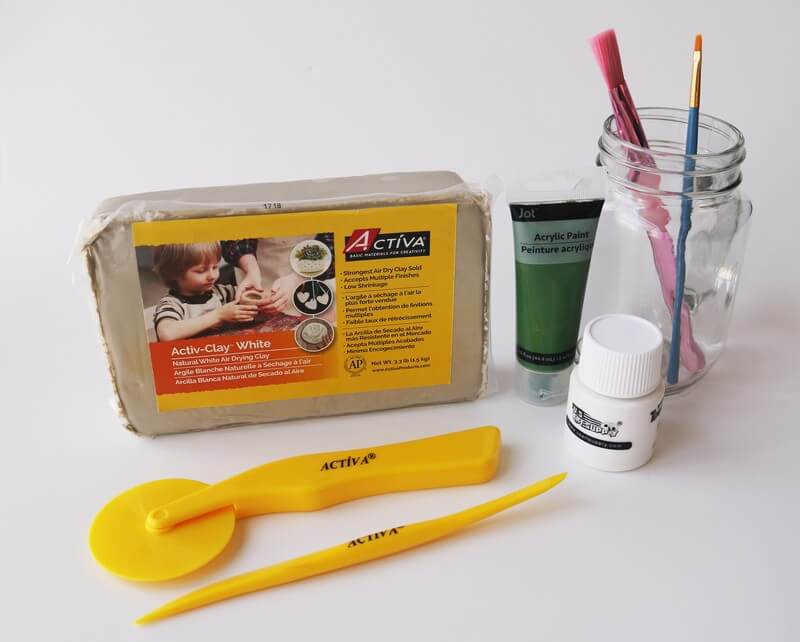
Materials needed:
- 1 package of Activ-Clay White 3.3 lbs.
- Activ-Tools™ Clay Tools Set
- Clay Roller Kit
- 10" Diameter Clay Sculpting Wheel
- Glass of water
- Brushes and acrylic paint
- Activa Sculpting Wheel
- Acrylic gloss sealer spray (optional)
- Paper towels
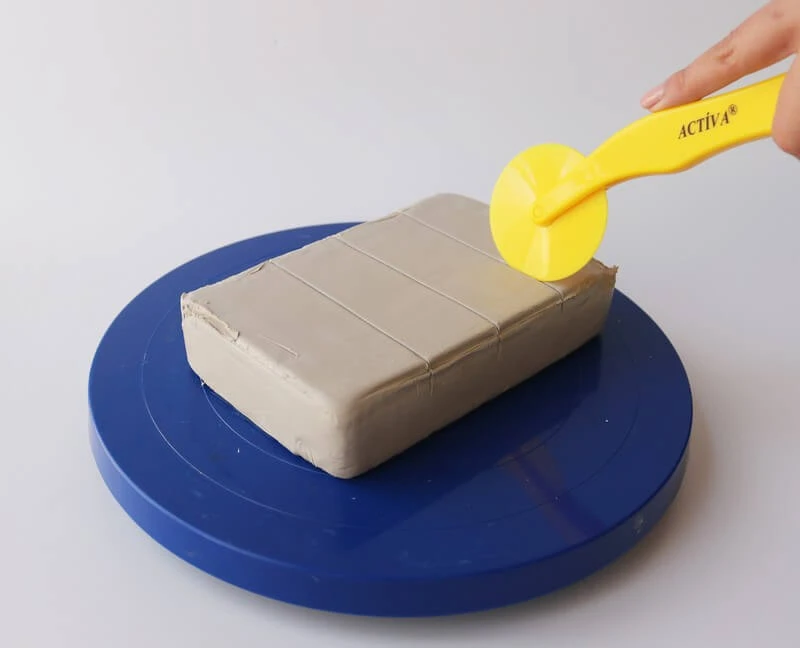
Step 1:
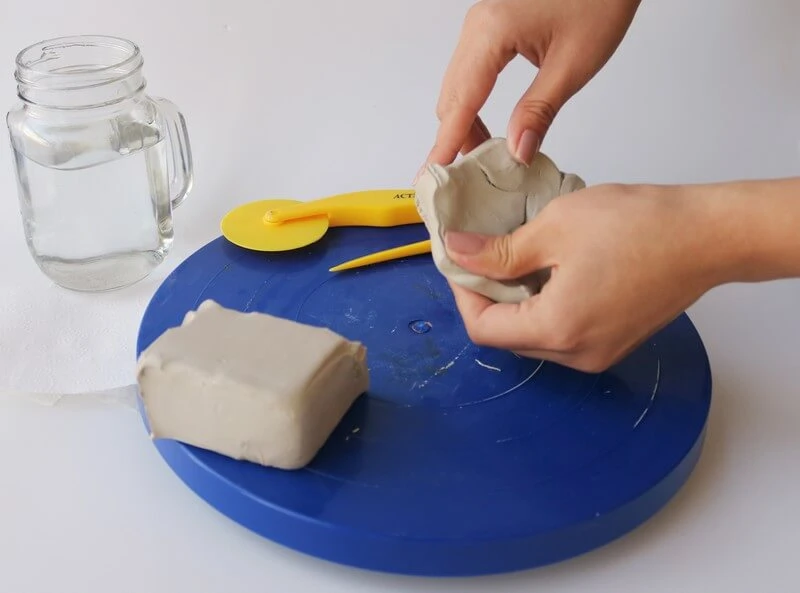
Open the package of Activ-Clay, and using a tool slice ¼ of clay for making one jewelry holder
Step 2:
Divide the clay in two parts, one for making the cactus and one for making the dish. We will start working with the dish or bottom part of the project, begin molding the clay with your hands
Step 3:
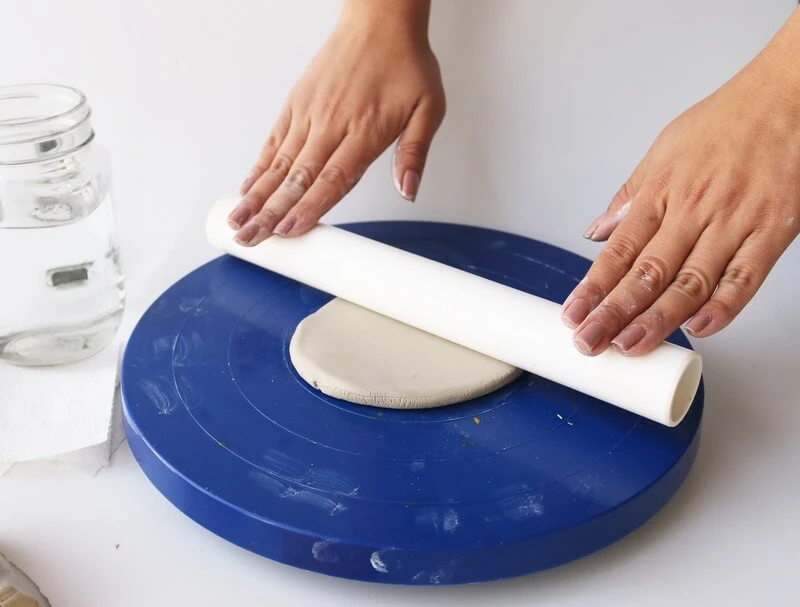
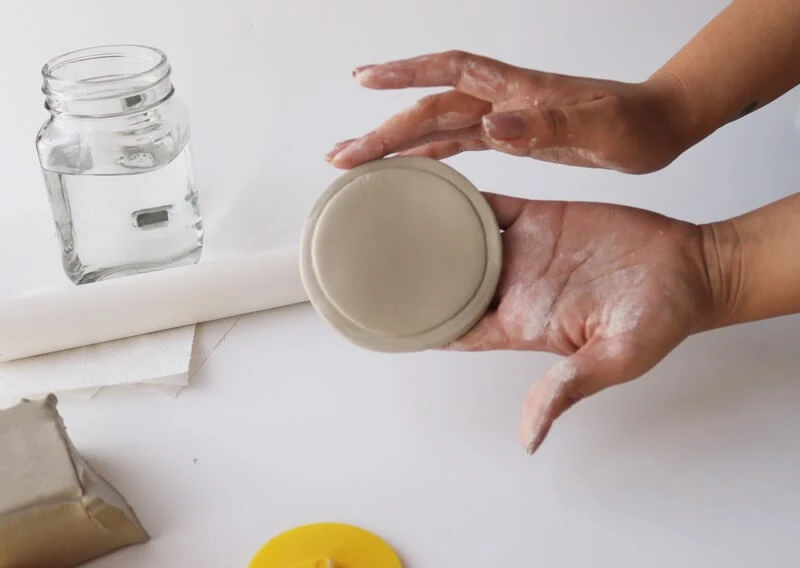
Use a roller to get an even surface, make sure to make it thick enough to hold the weight of the cactus (¼ of an inch will be perfect!)
Step 4:
Diameter recommended for the dish is 3 - 4 inches, have fun designing it, you can add waves, texture, etc… or you can keep it nice and simple
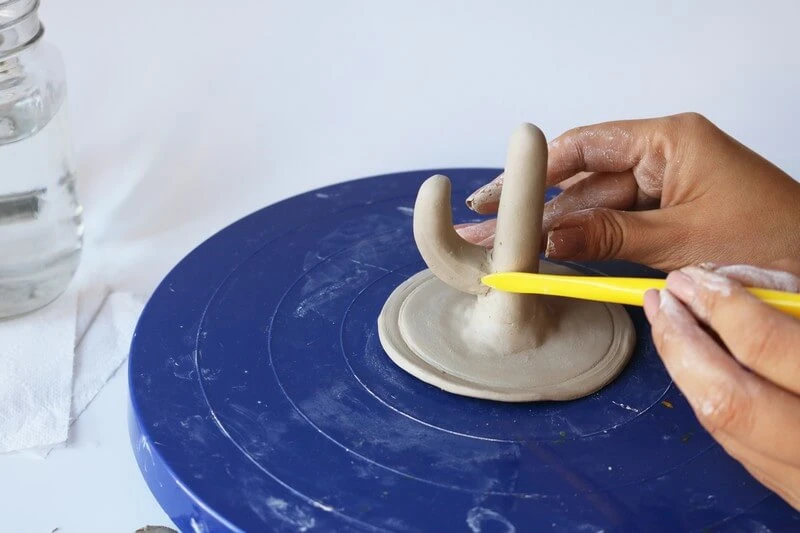
Step 5:
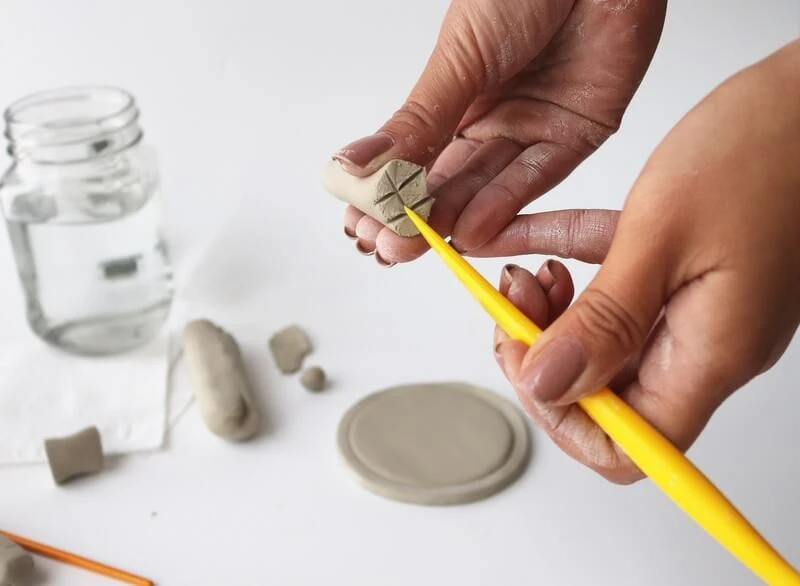
Now we are going to work on making the long center part of the cactus, start rolling a piece of clay with your hands in the shape of a small sausage, make sure the diameter is the correct size for holding multiple rings. (½ of an inch will work) Once you got the cactus ready, it’s time to stick it to the dish; to attach two parts of clay together, score both sides with a tool, apply a tiny drop of water (it will work like glue), and mush them together. (as shown in picture)
Step 6:
Once the first part of the cactus is added to the dish, start applying thin layers of clay on the base of the cactus one at the time, to make sure it’s solid and both parts will stay together. Remember a tiny drop of water always works like glue to attach pieces of clay

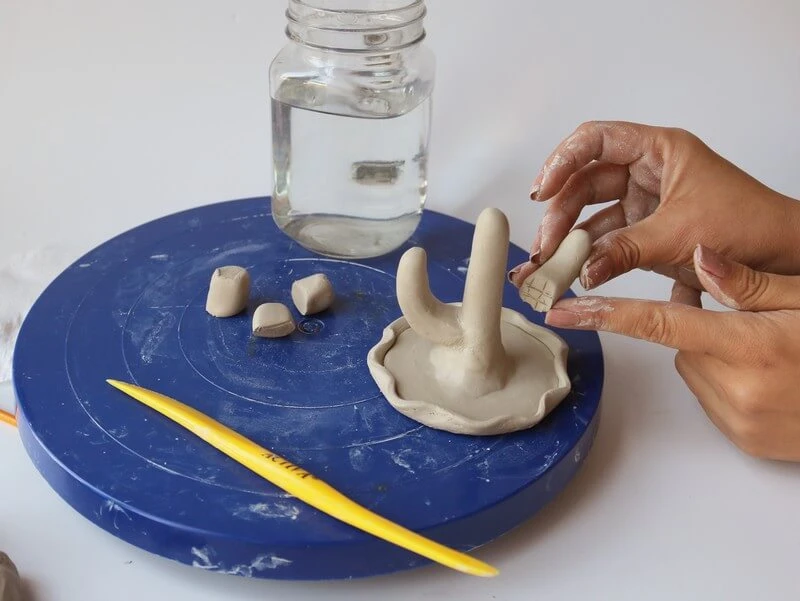
Step 7:
Next step is making the two “arms” of the cactus by repeating steps number 5 and 6
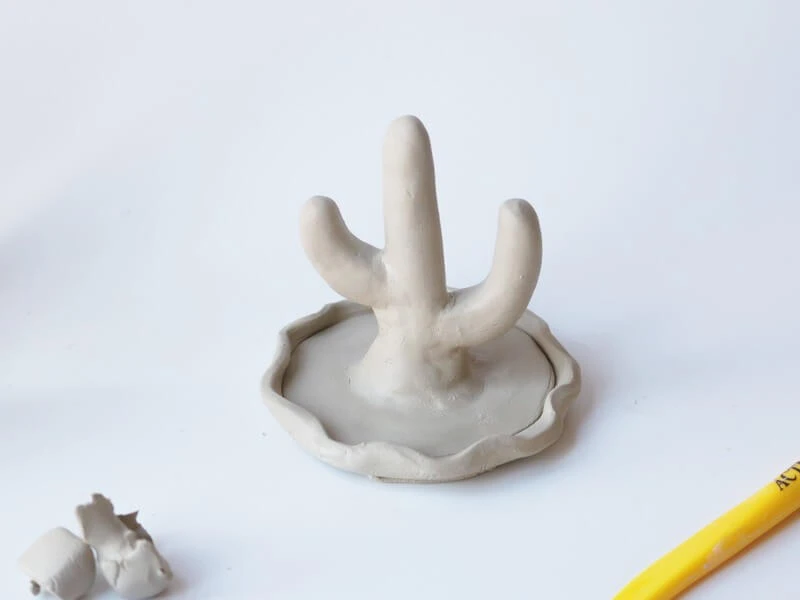
Step 8:
Once your cactus jewelry holder is ready, now is time to let it set, we recommend 1 - 2 hours of air drying time. Drying tips: don’t try to accelerate the drying time by using a hair blower, microwave, oven, etc… this will cause cracks and it will break. Very carefully tilt the cactus and make sure the bottom part is always ventilated too, to avoid cracks.
Step 9:
You will see the color of the clay to turn white when is completely dried, this is the sign to start painting it! Have fun!
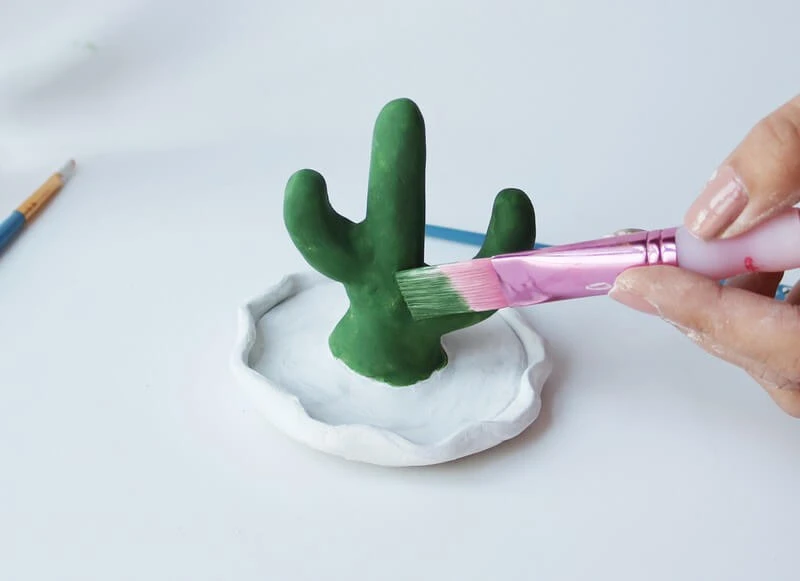
Step 10:
Let the paint set for 30 minutes, add a layer of acrylic glossy or matte finish if desired. Your DIY Activ-Clay Cactus Jewelry Holder is ready!